How to Register and Verify Account on OKX
How to Register an Account on OKX
Register an Account on OKX with Email
1. Go to OKX and click [Sign up] on the upper right corner.
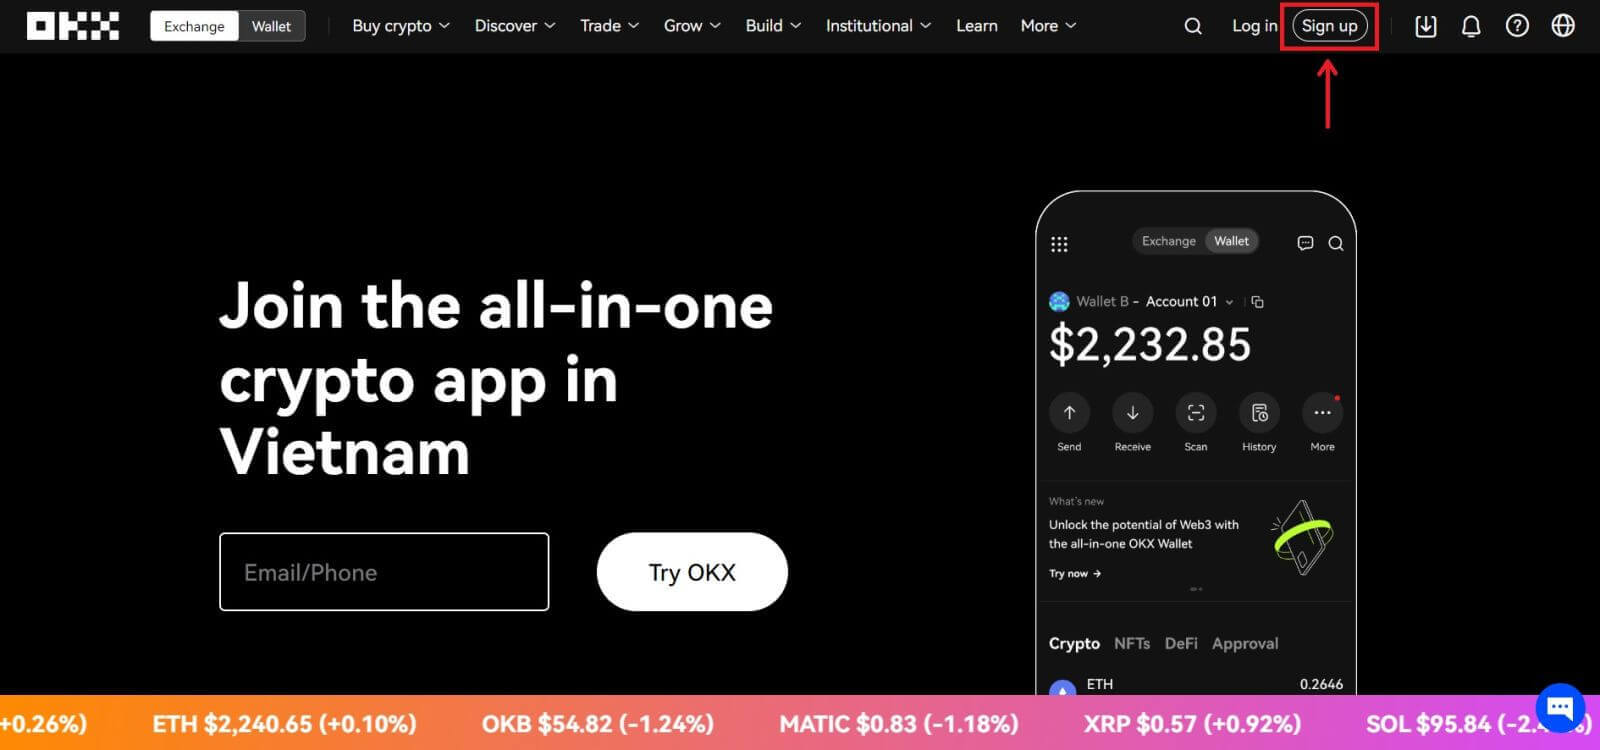
2. You can perform OKX registration via a social network (Google, Apple, Telegram, Wallet) or manually enter the data required for the registration.
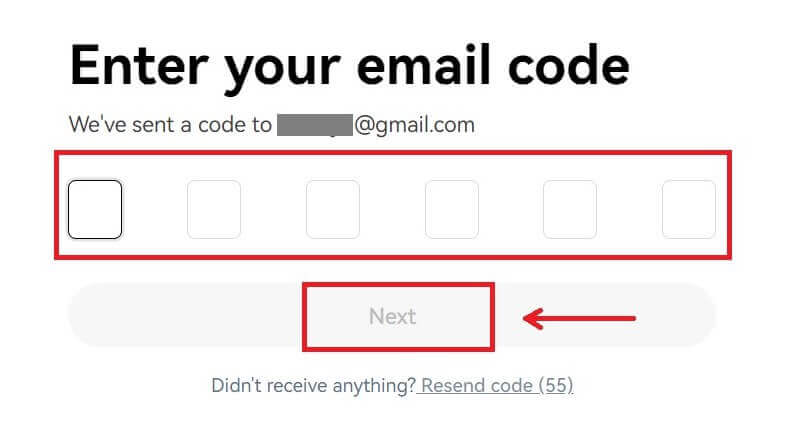
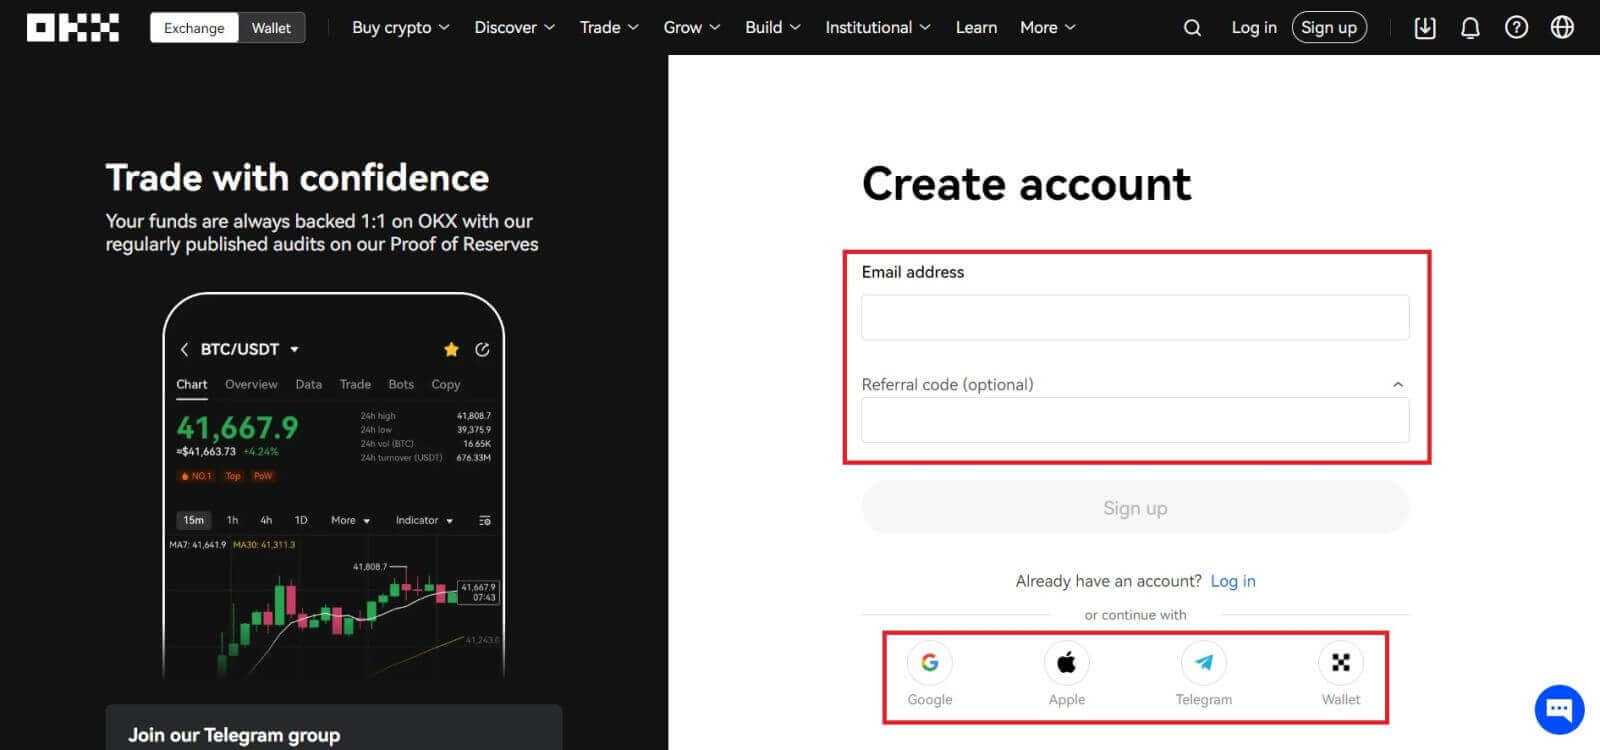 3. Enter your email address then click [Sign up]. You will be sent a code to your email. Put the code in the space and hit [Next].
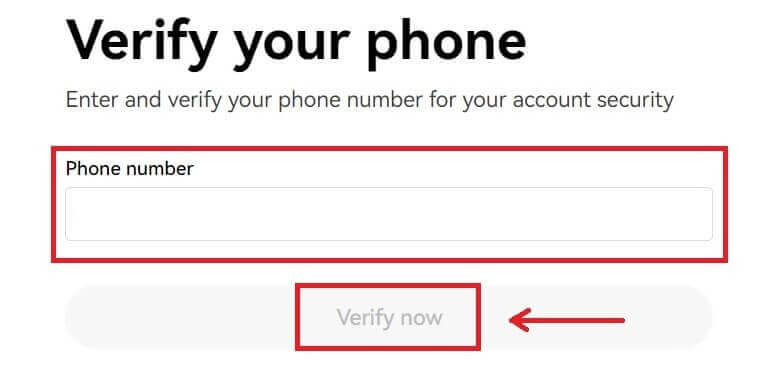
4. Enter your phone number and hit [Verify now].
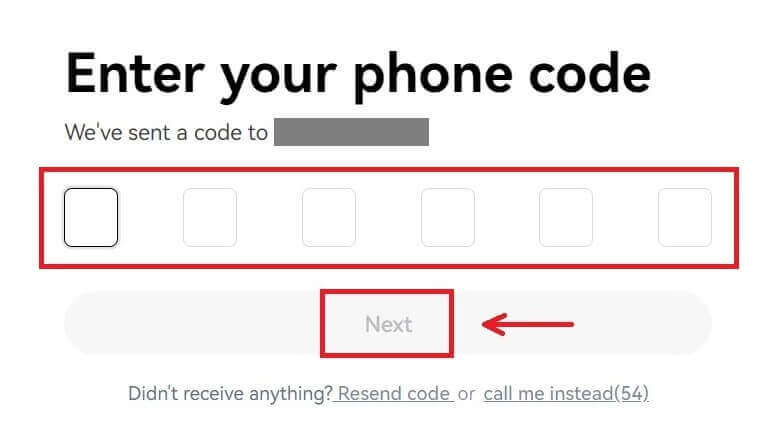
5. Enter the code that has been sent to your phone, click [Next].
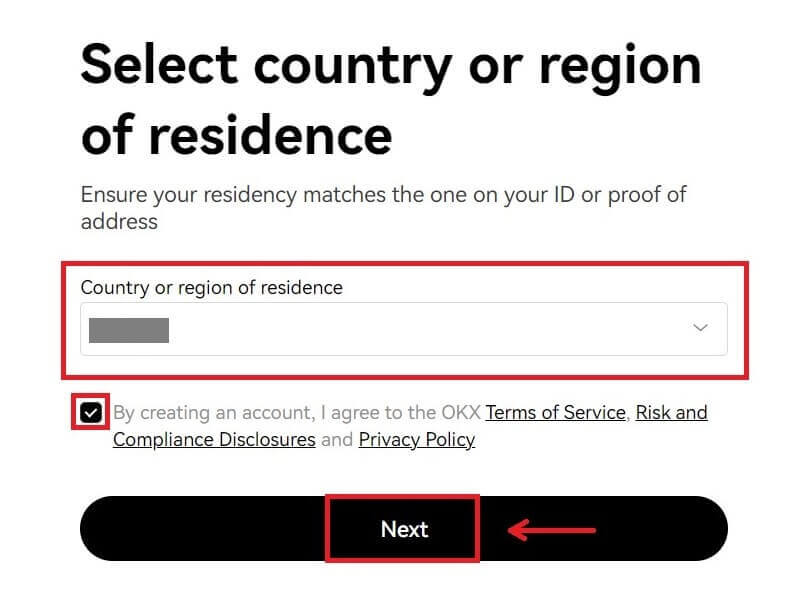
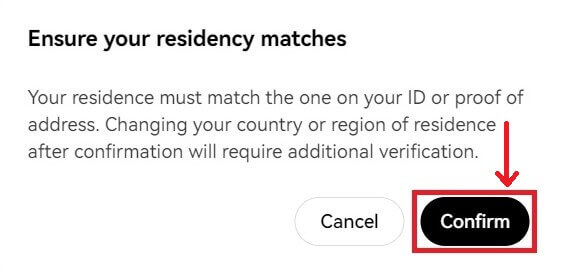
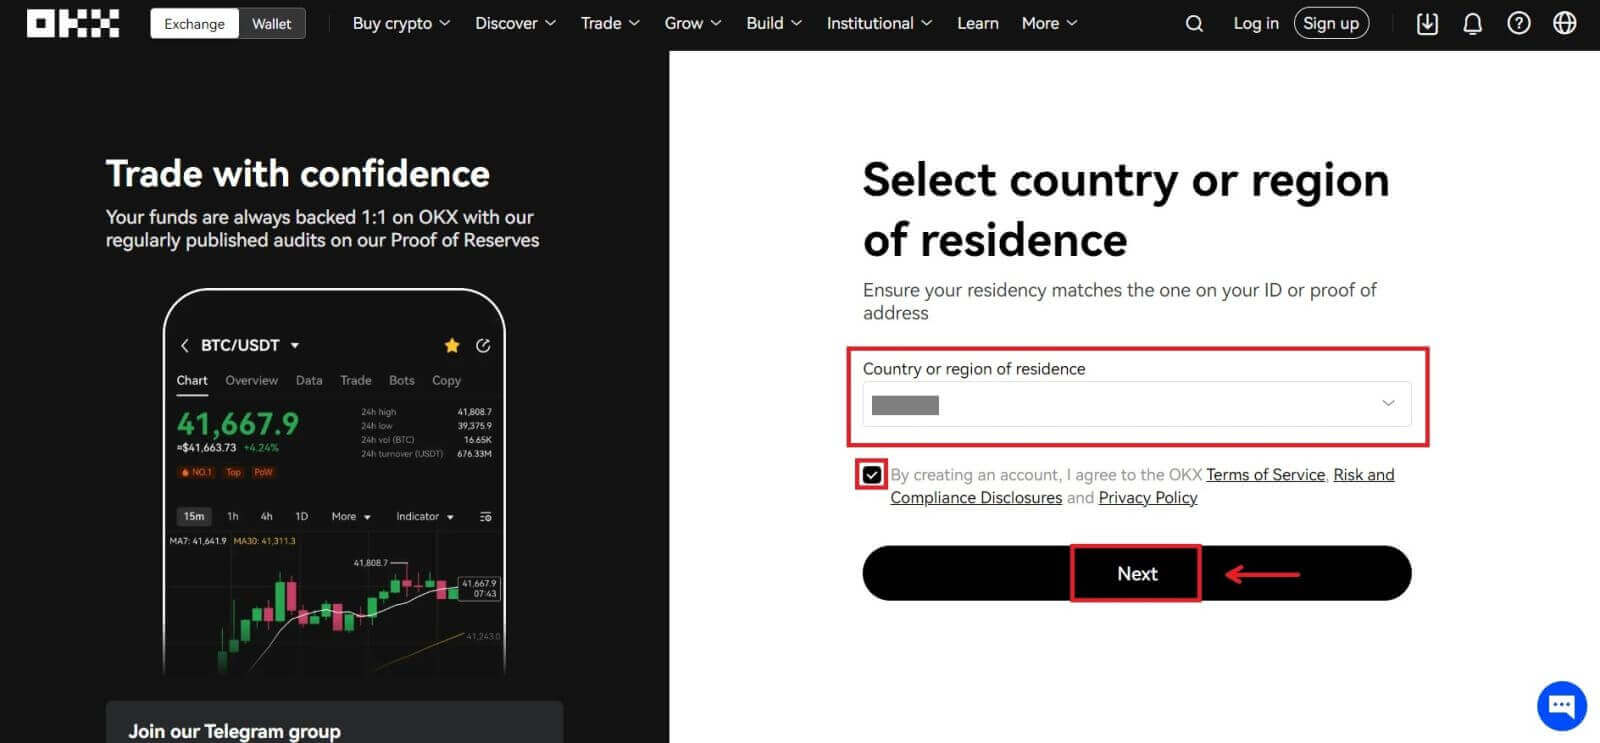
6. Choose your country of residence, tick to agree to the terms of service and click [Next]. Note that your residence must match the one on your ID or proof of address. Changing your country or region of residence after confirmation will require additional verification. Click [Confirm].
7. Then, create a secure password for your account.
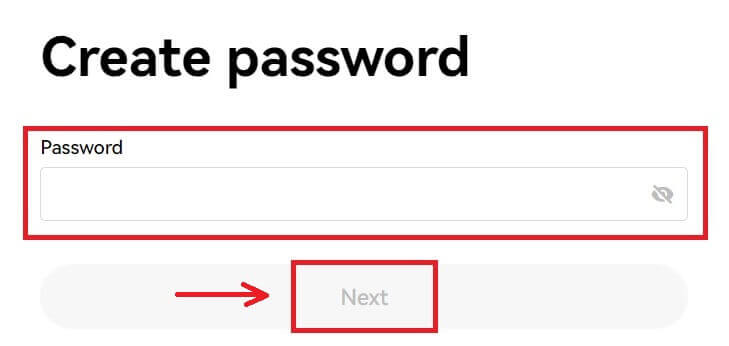
Note:
- Your password must contain 8-32 characters long
- 1 lowercase character
- 1 uppercase character
- 1 number
- 1 special character e.g. ! @ # $ %
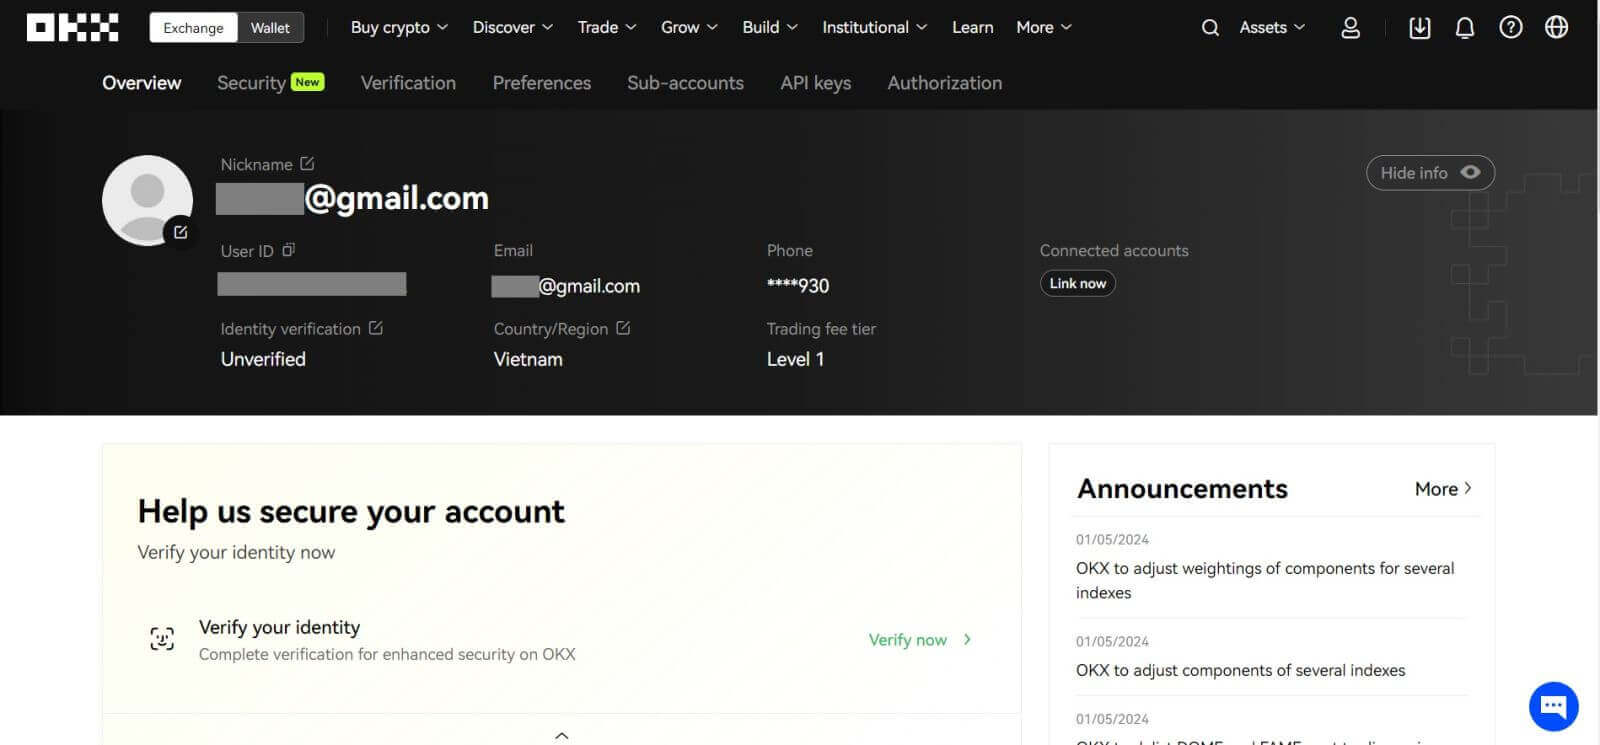
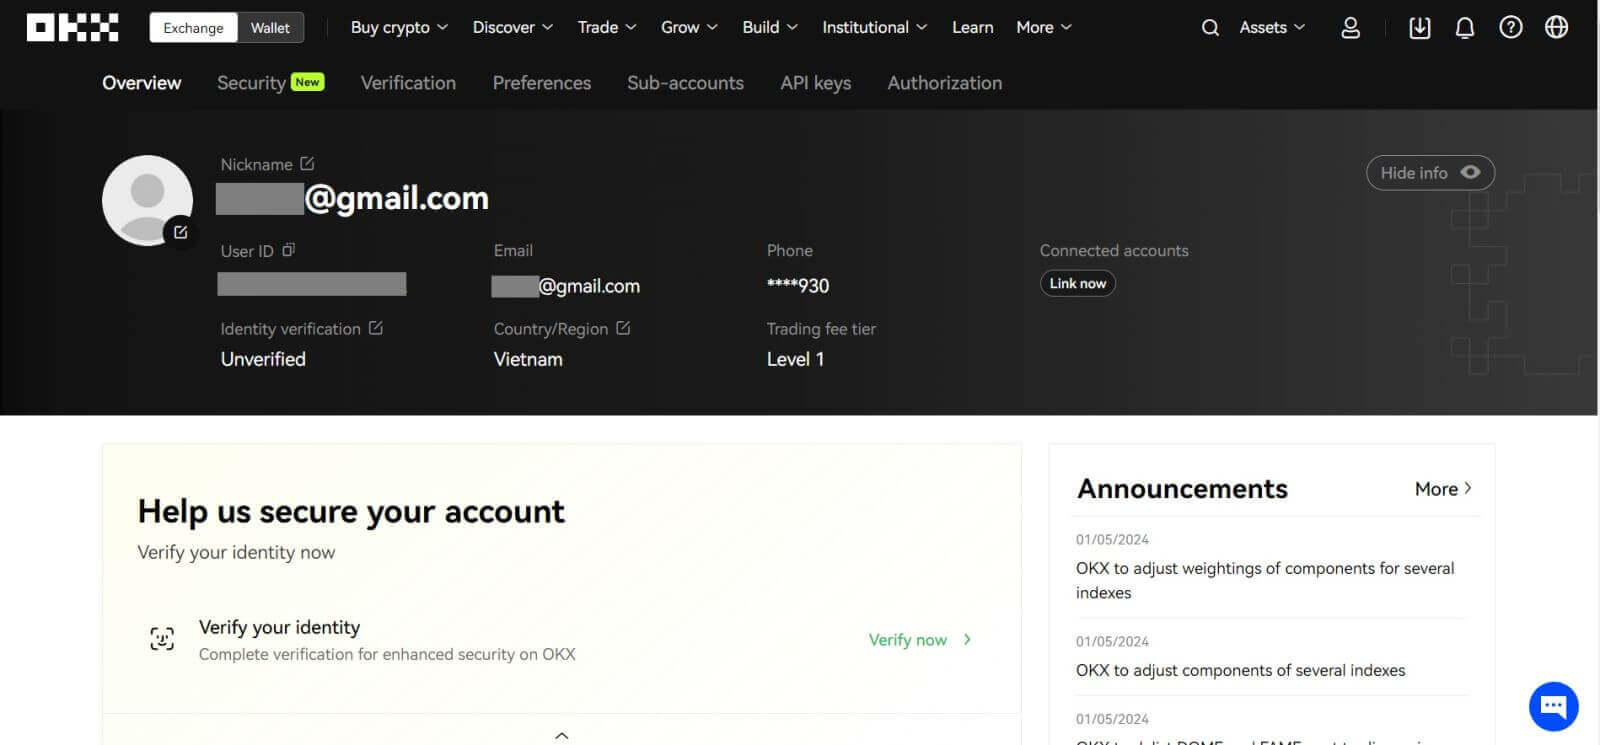
8. Congratulations, you have successfully registered on OKX.
Register an Account on OKX with Apple
Furthermore, you can sign up using Single Sign-On with your Apple account. If you wish to do that, please follow these steps:
1. Visit OKX and click [Sign up].
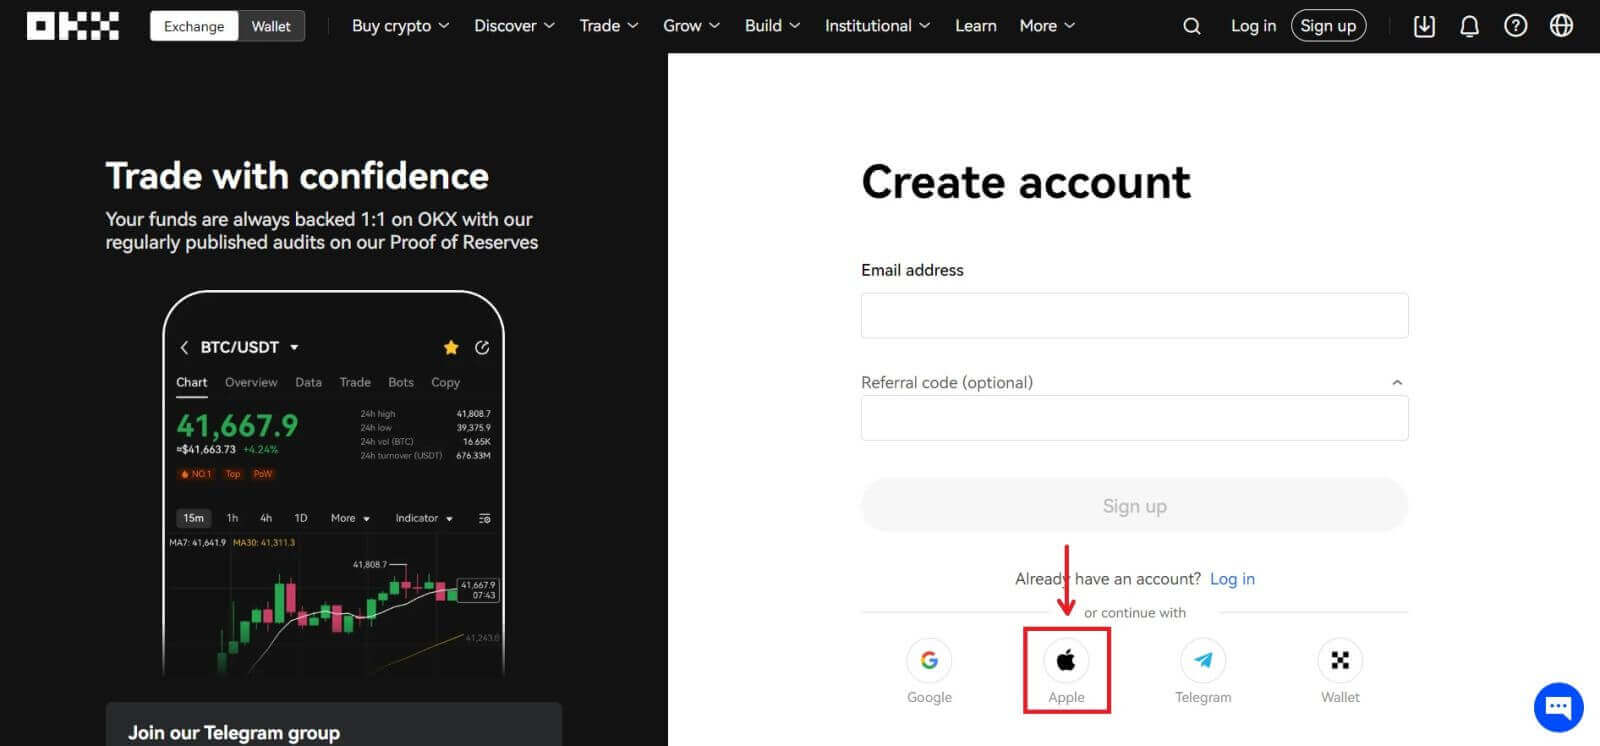
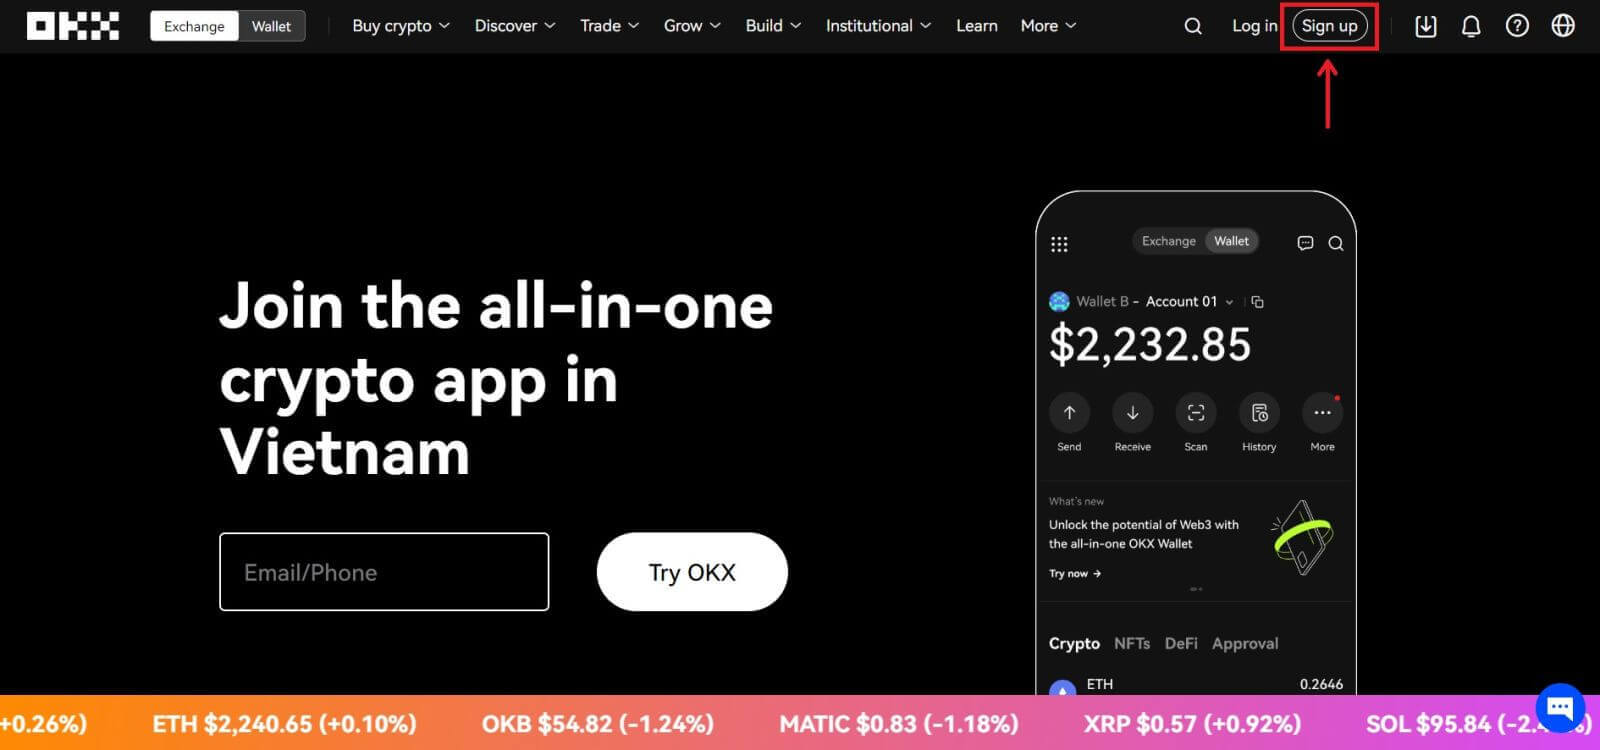 2. Select [Apple] icon, a pop-up window will appear, and you will be prompted to sign in to OKX using your Apple account.
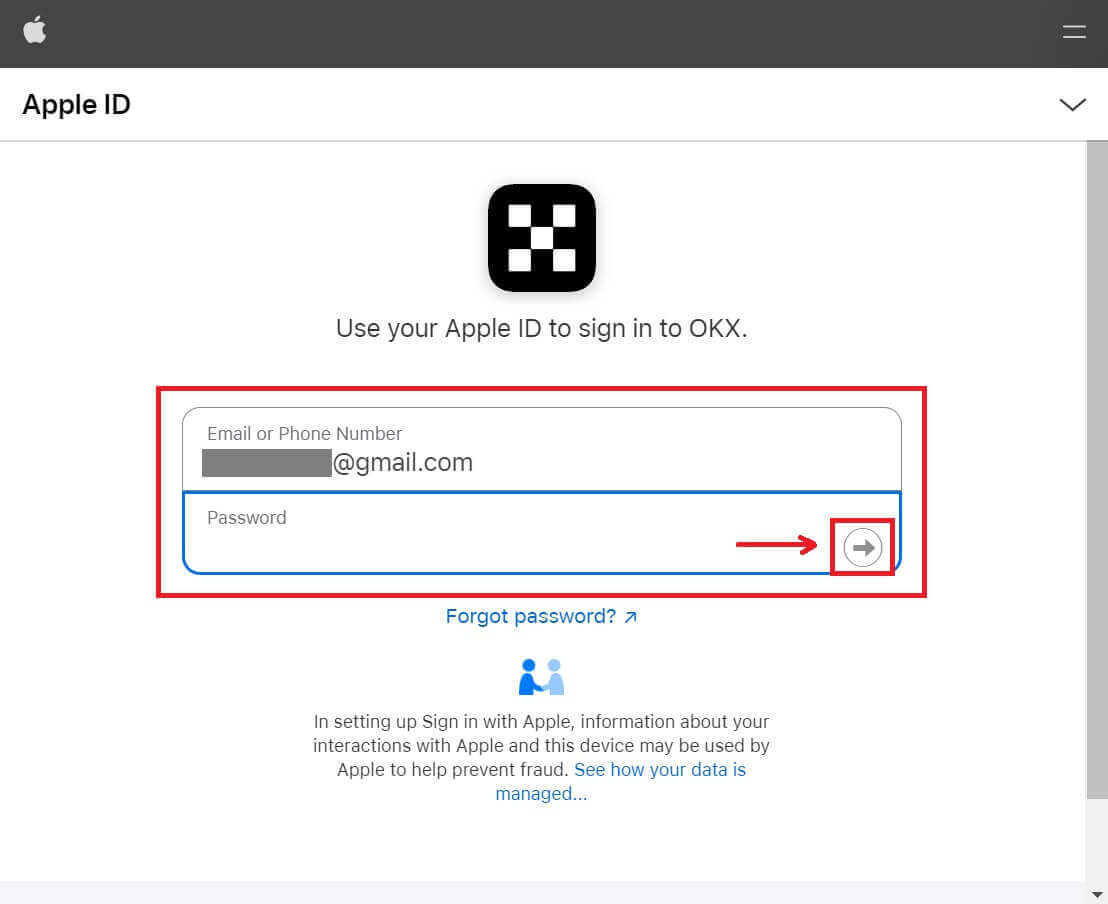
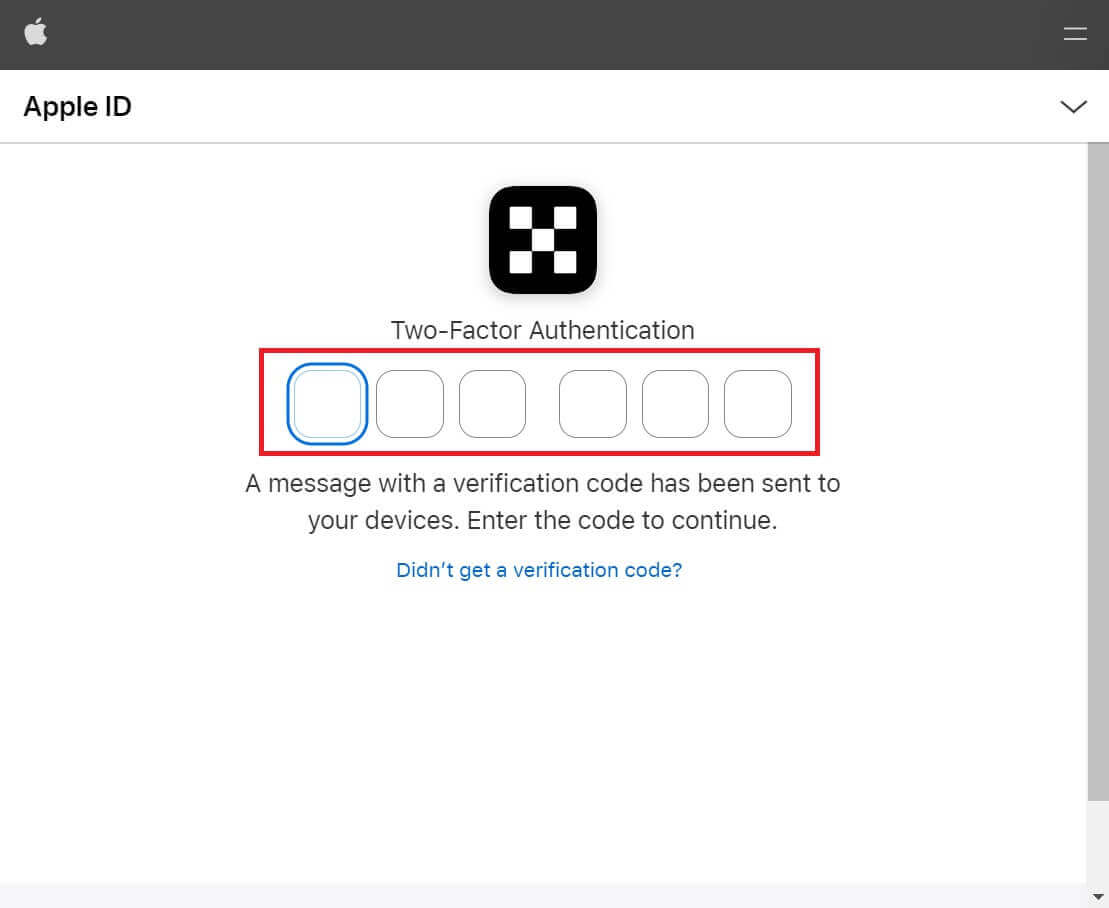
3. Enter your Apple ID and password to sign in to OKX. Complete the authentication process.
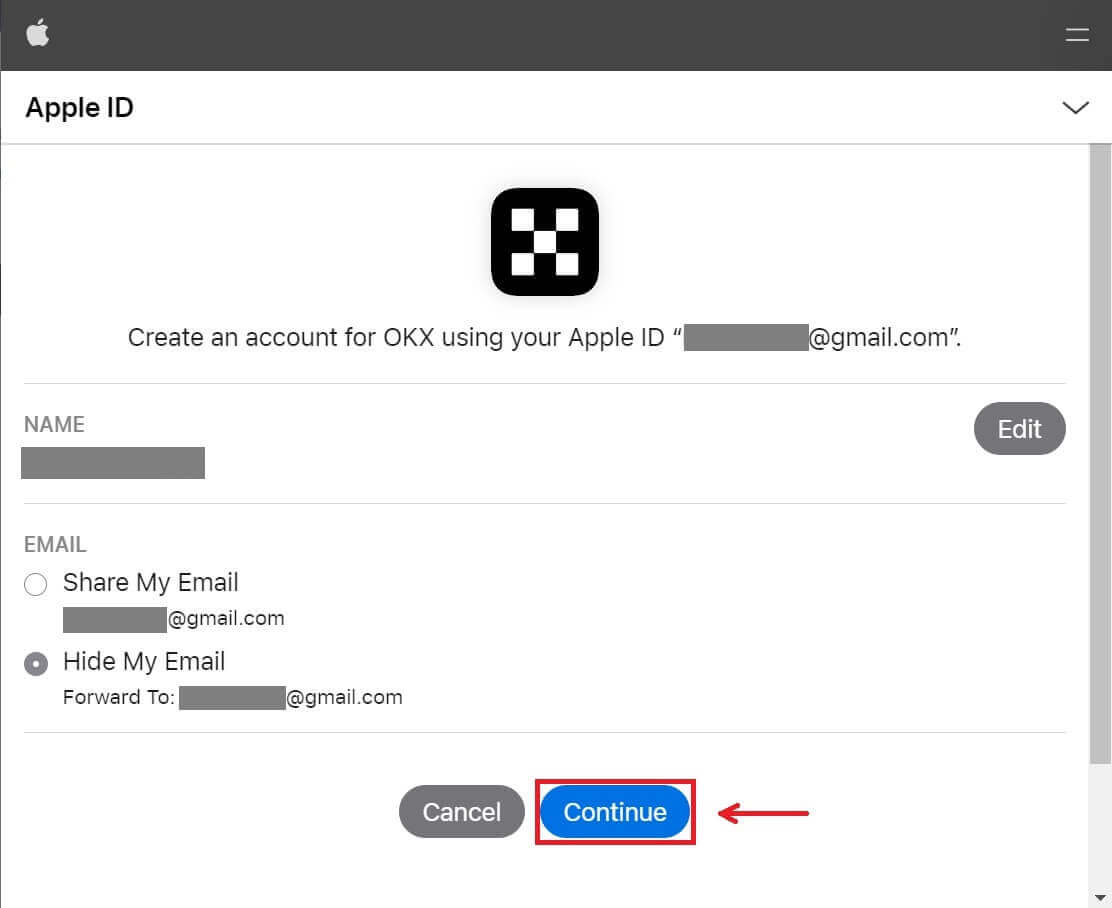
4. Click [Continue].
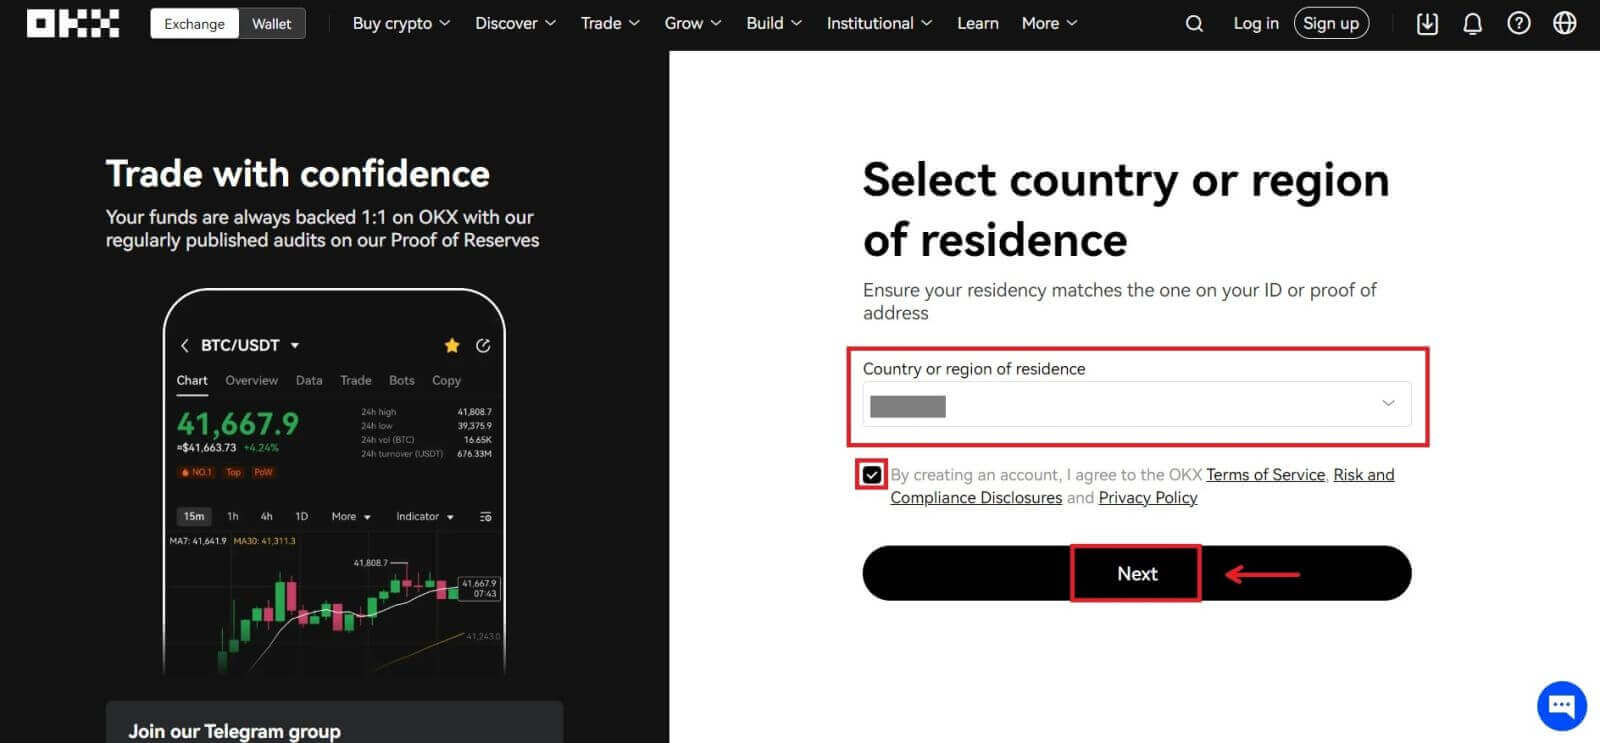
5. Choose your country of residence, tick to agree to the terms of service and click [Next]. Note that your residence must match the one on your ID or proof of address. Changing your country or region of residence after confirmation will require additional verification.
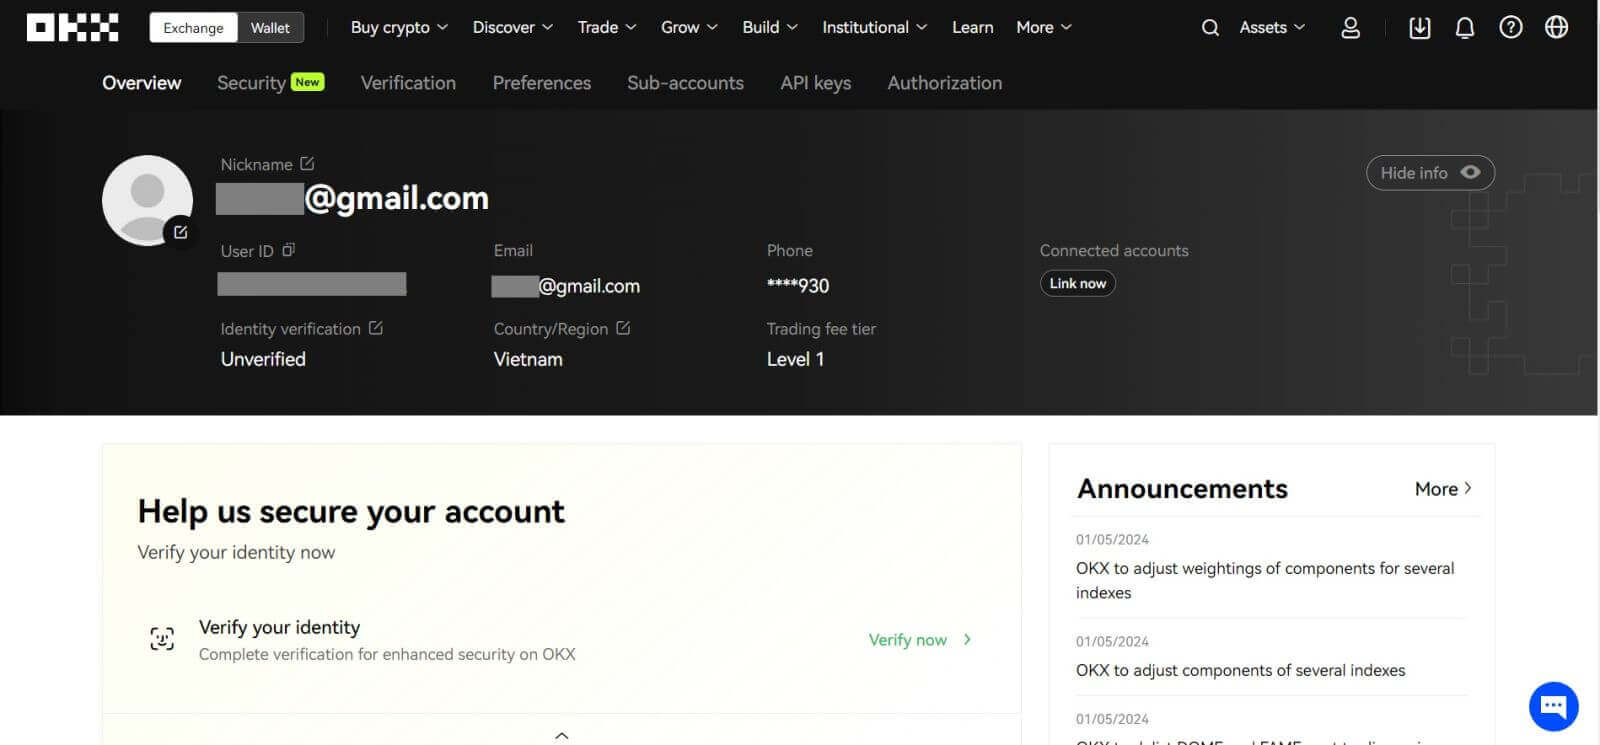
6. After that, you will be automatically redirected to the OKX platform.
Register an Account on OKX with Google
Also, you have an option to register your account through Gmail and you can do that in just a few simple steps:
1. Head over to the OKX and click [Sign up].
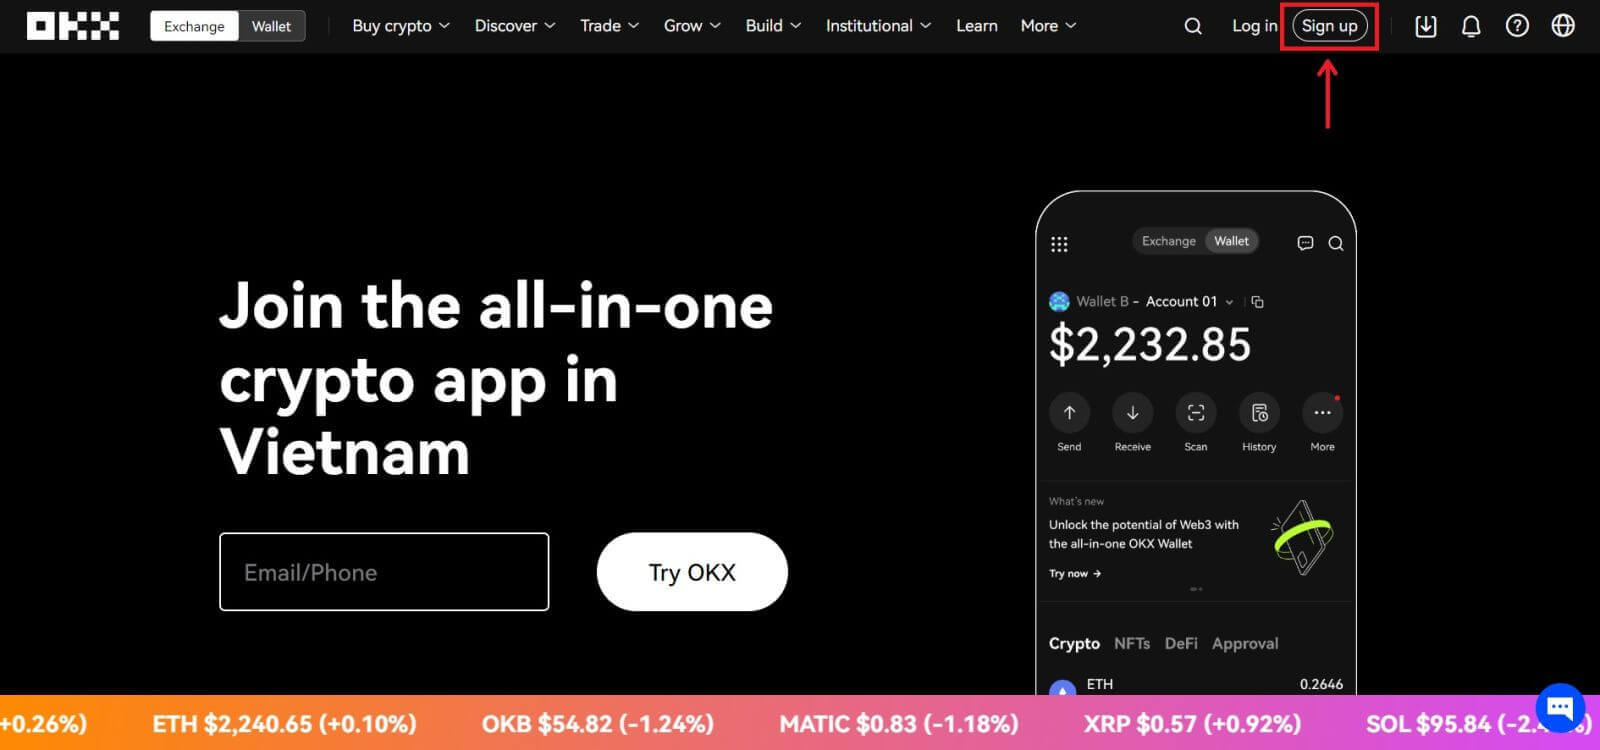 2. Click on the [Google] button.
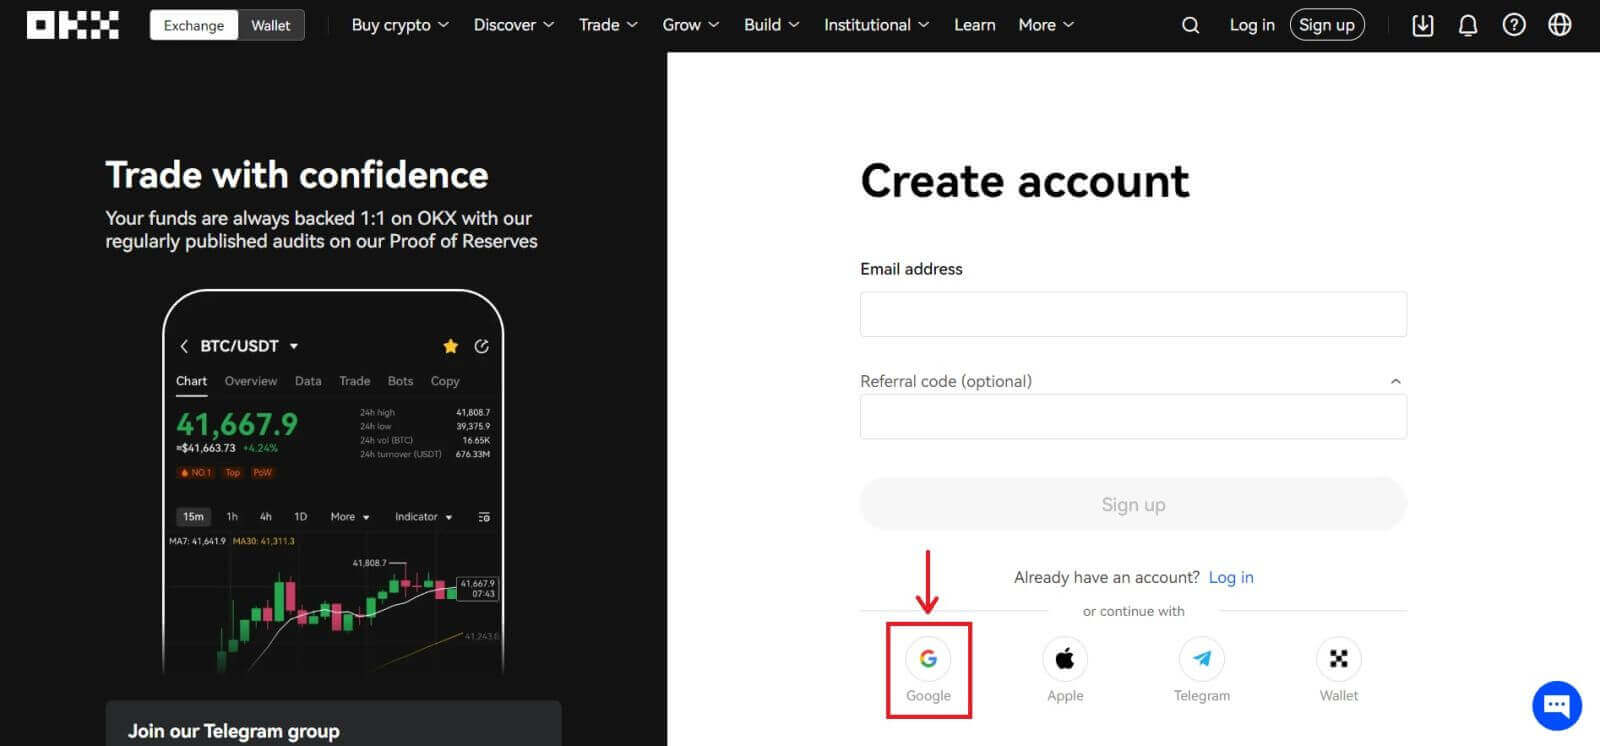
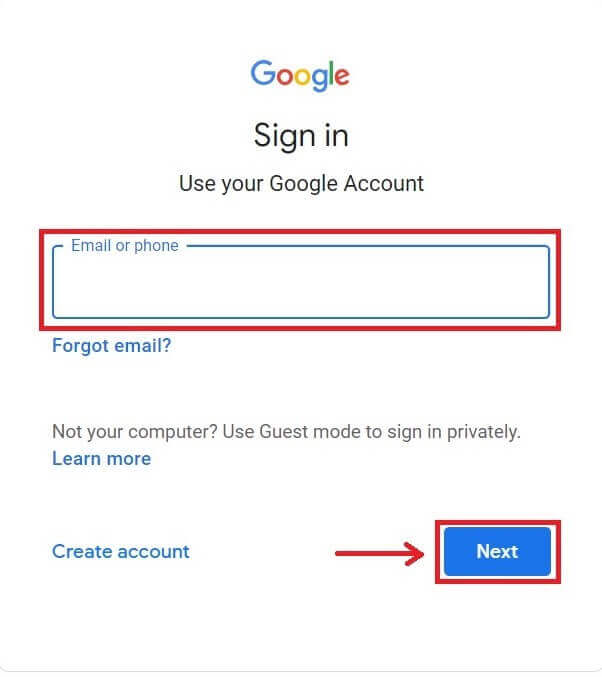
3. A sign-in window will be opened, where you put in your Email or phone. Then click [Next]
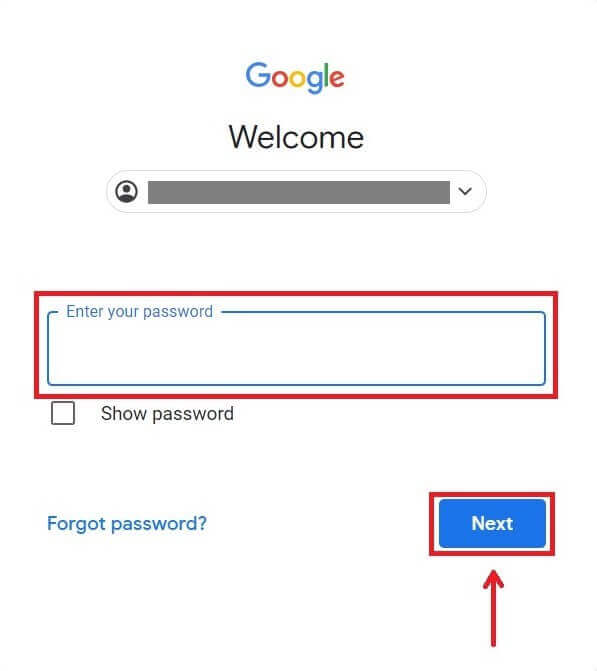
4. Then enter the password for your Gmail account and click [Next]. Confirm that you’re signing in
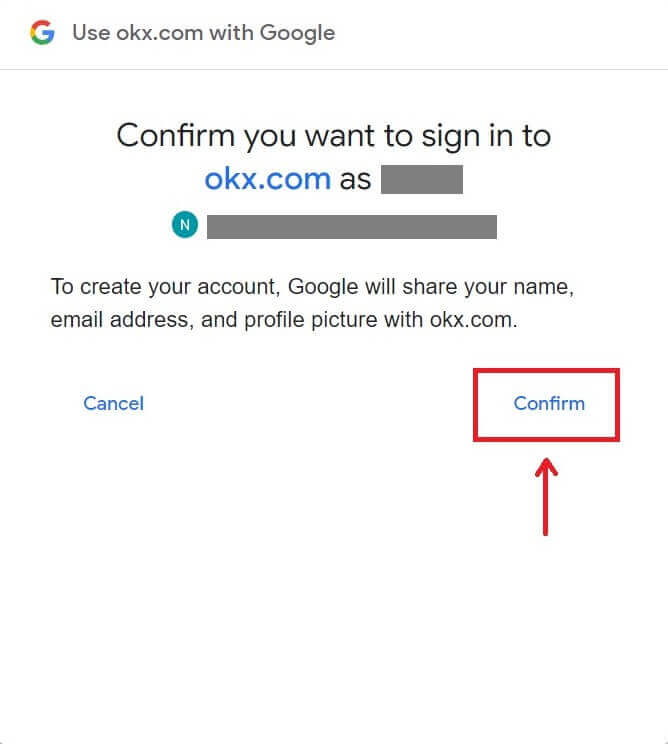
5. Choose your country of residence, tick to agree to the terms of service and click [Next]. After that, you will be automatically redirected to your OKX account.
Register an Account on OKX with Telegram
1. Head over to the OKX and click [Sign up].
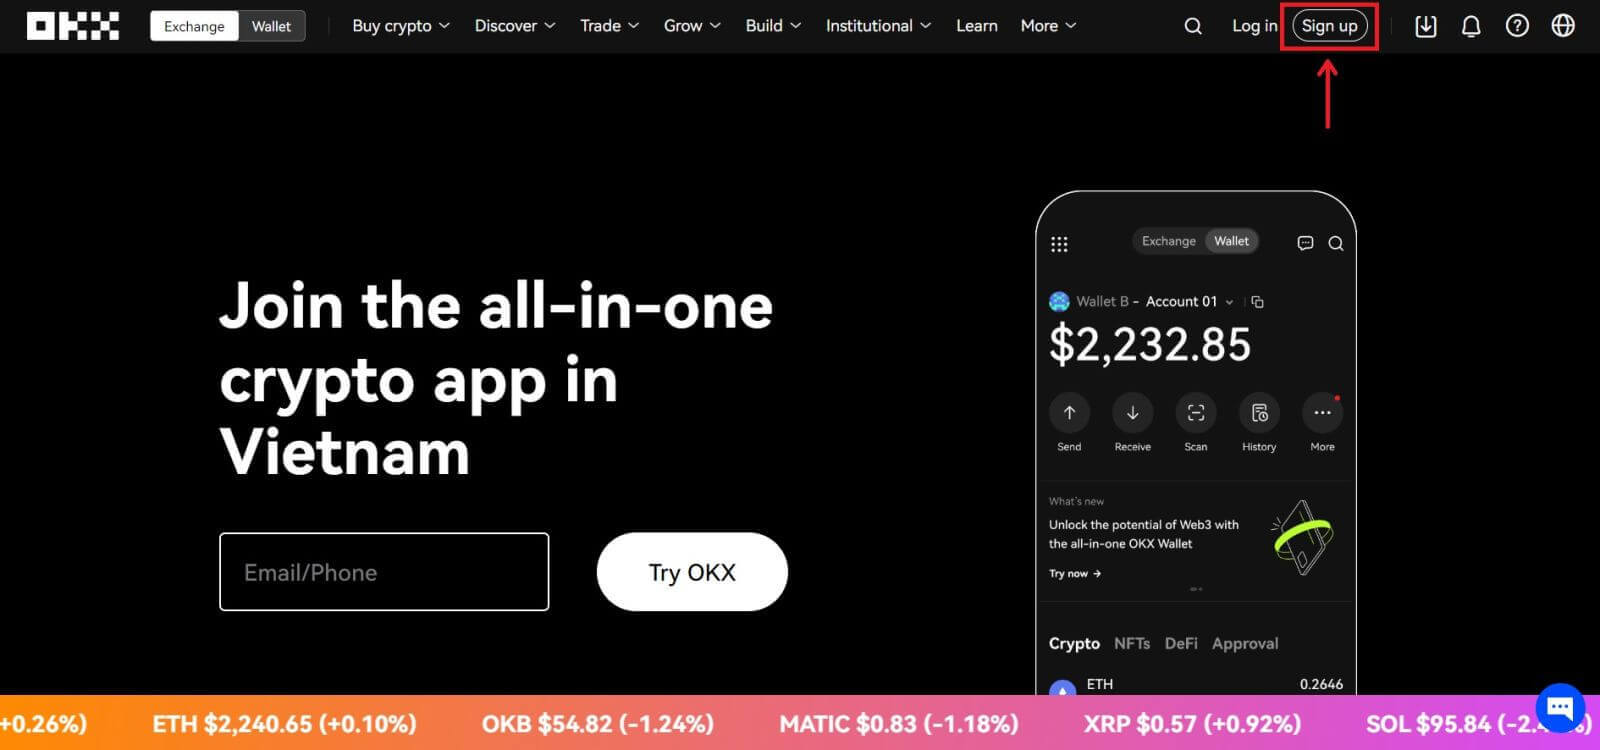 2. Click on the [Telegram] button.
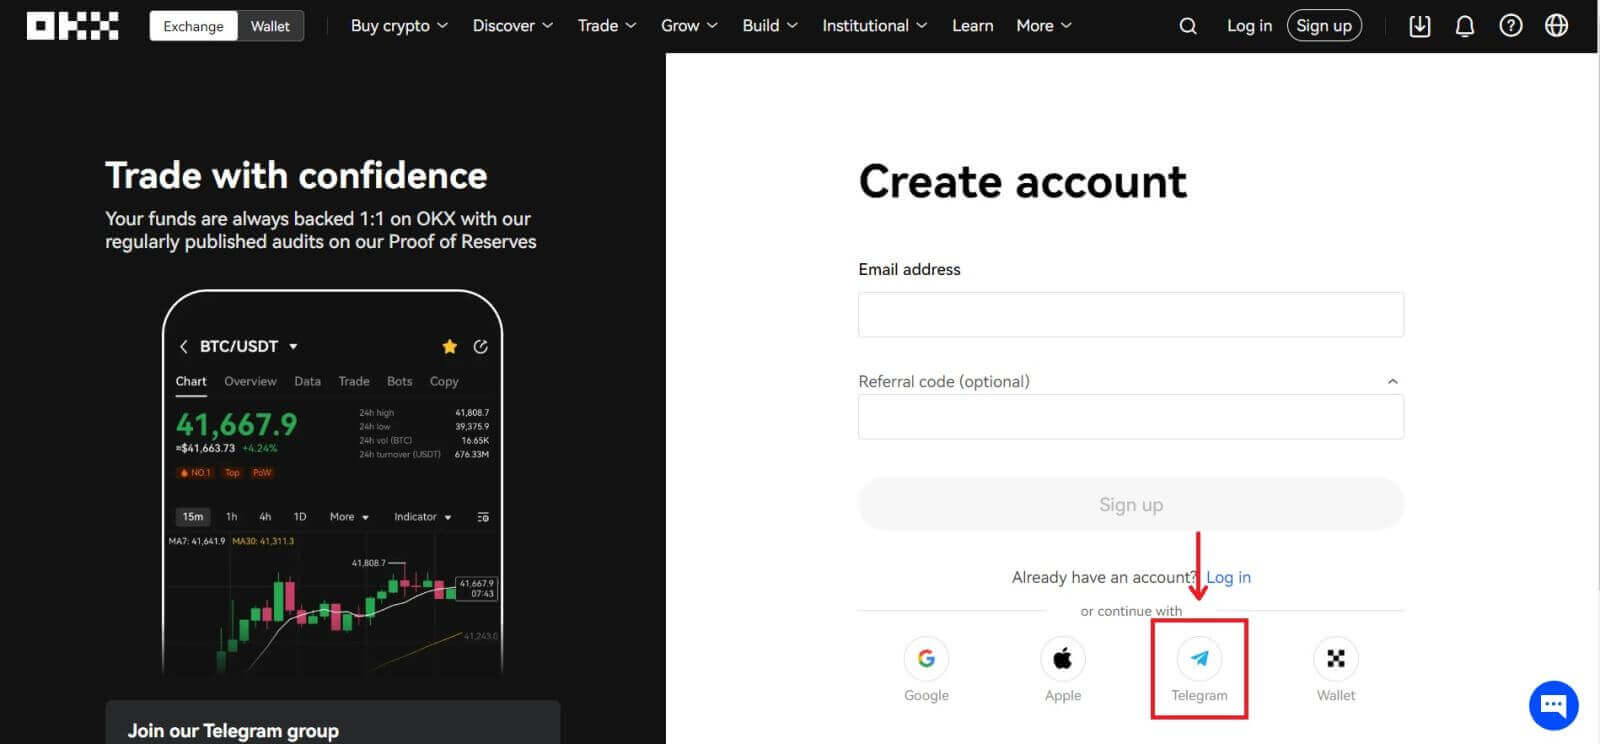 3. A sign-in window will be opened, where you put in your phone number. Then click [Next].
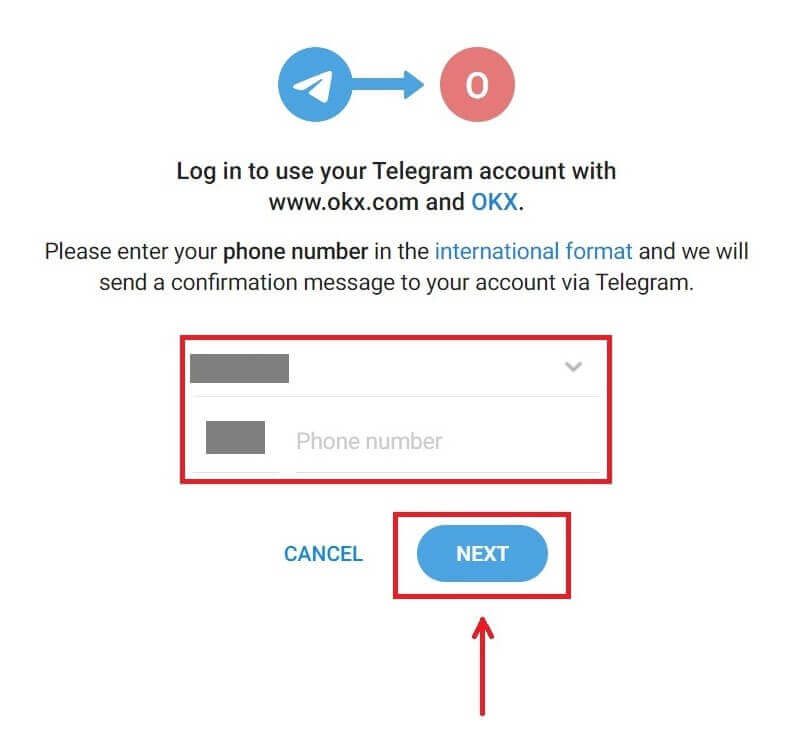
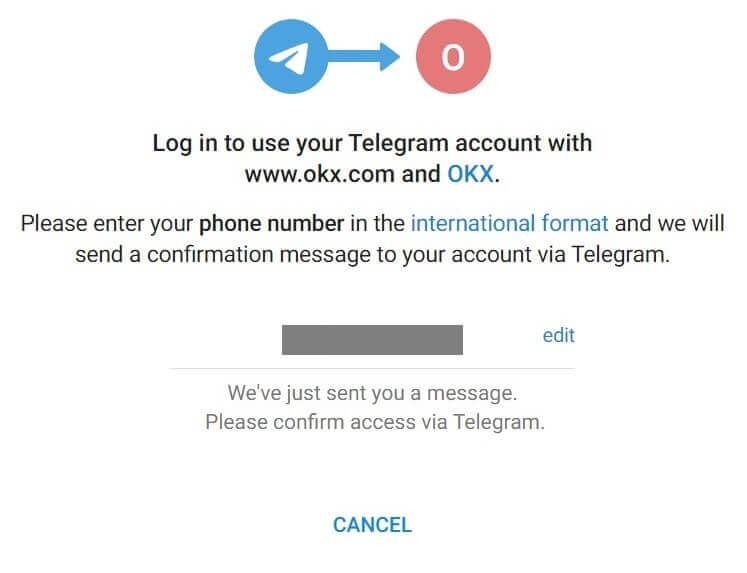
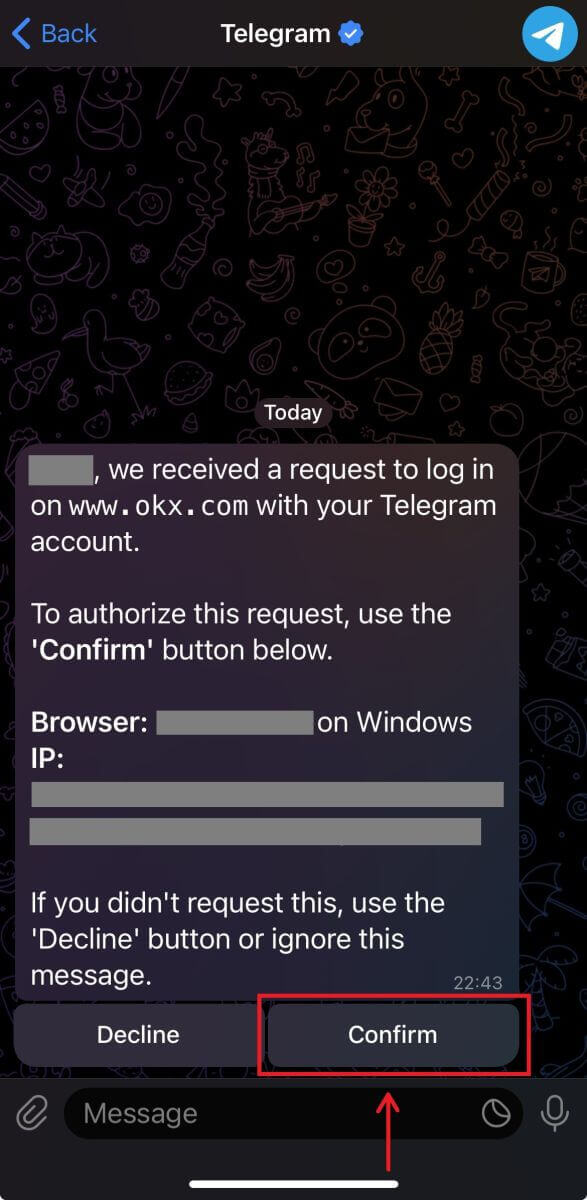
4. Open your Telegram and confirm.
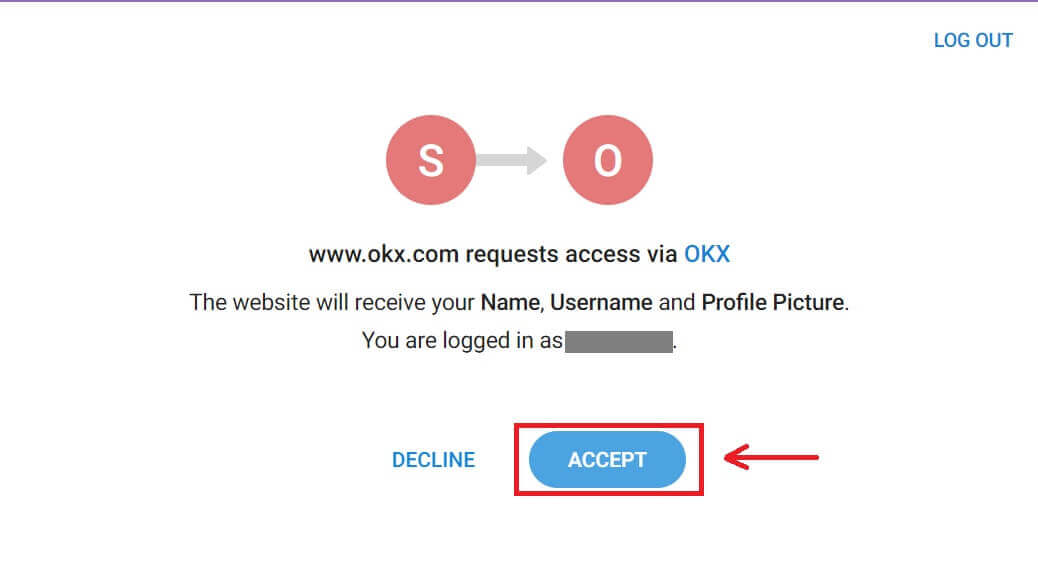
5. Click [Accept] to confirm your registration.
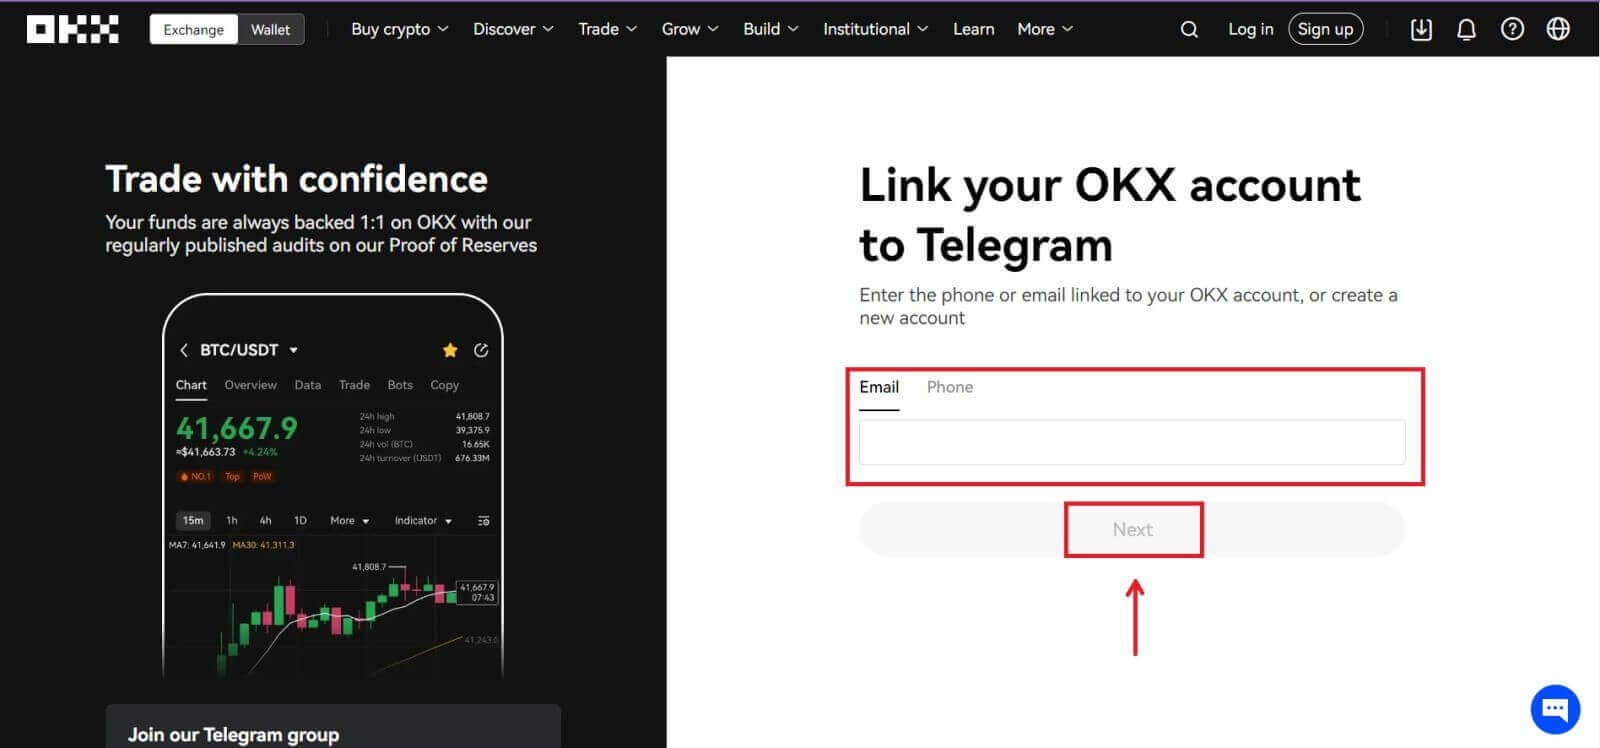
6. Enter your Email or Phone number to link your OKX account to Telegram. Then click [Next].
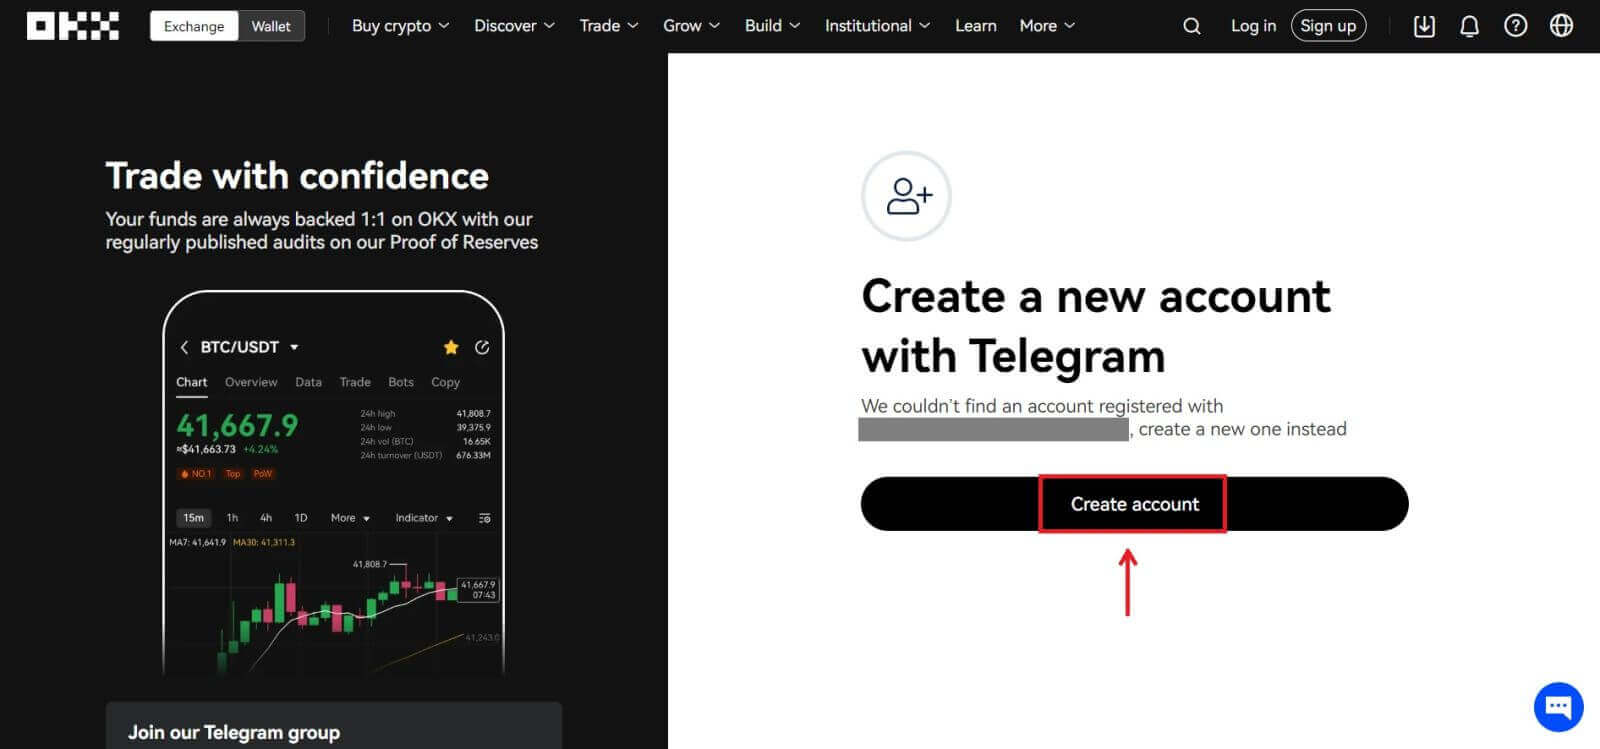
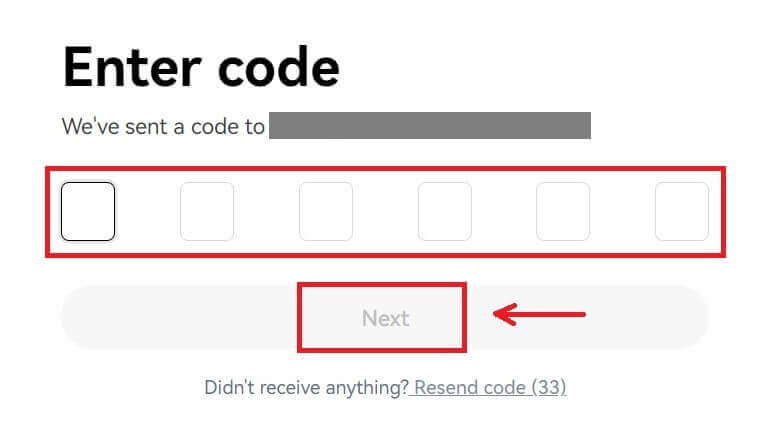
 7. Click [Create account]. Enter the code that has been sent to your Email and click [Next].
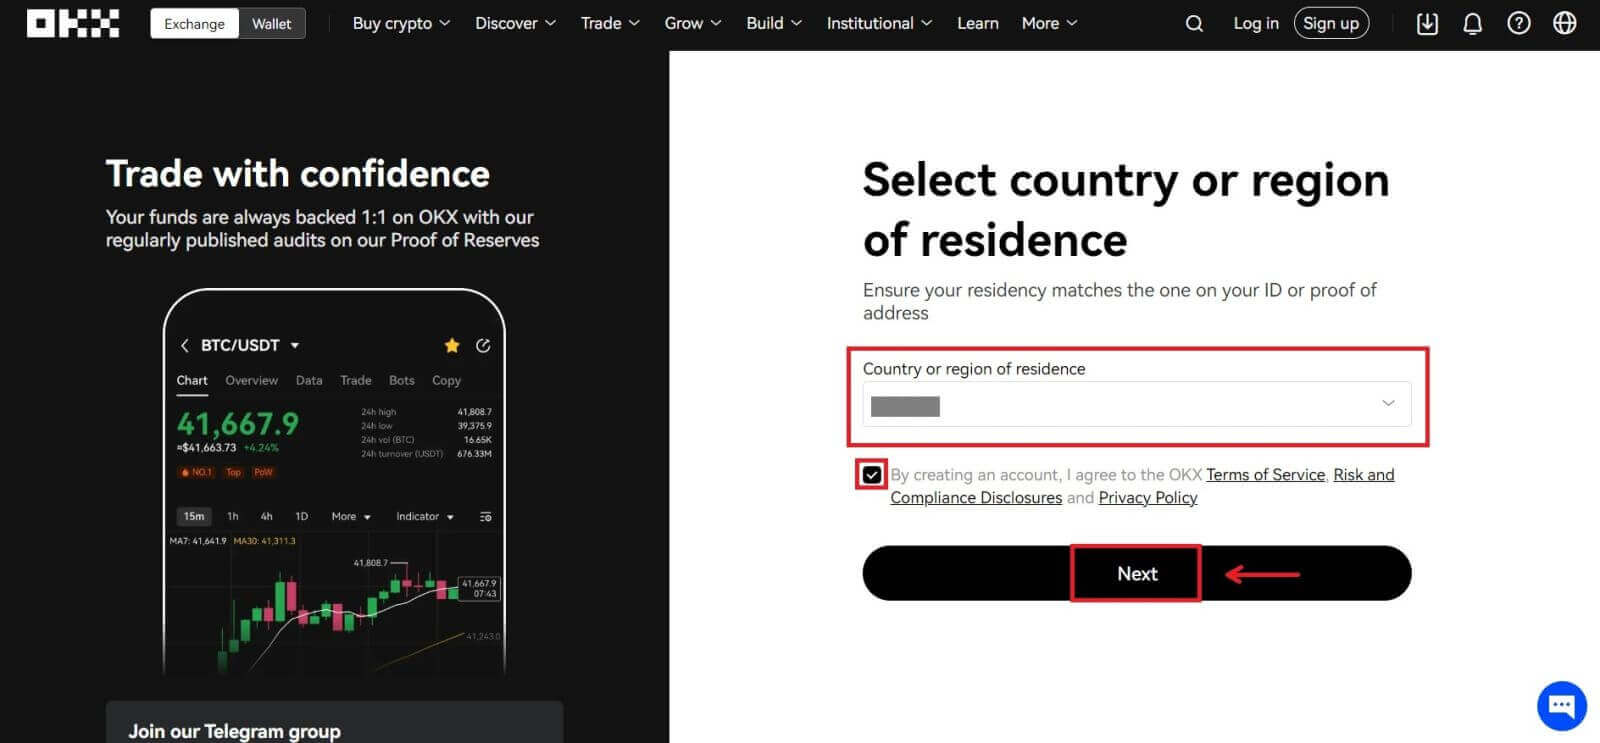
8. Choose your country of residence, tick to agree to the terms of service and click [Next]. Then you will successfully register your OKX account!
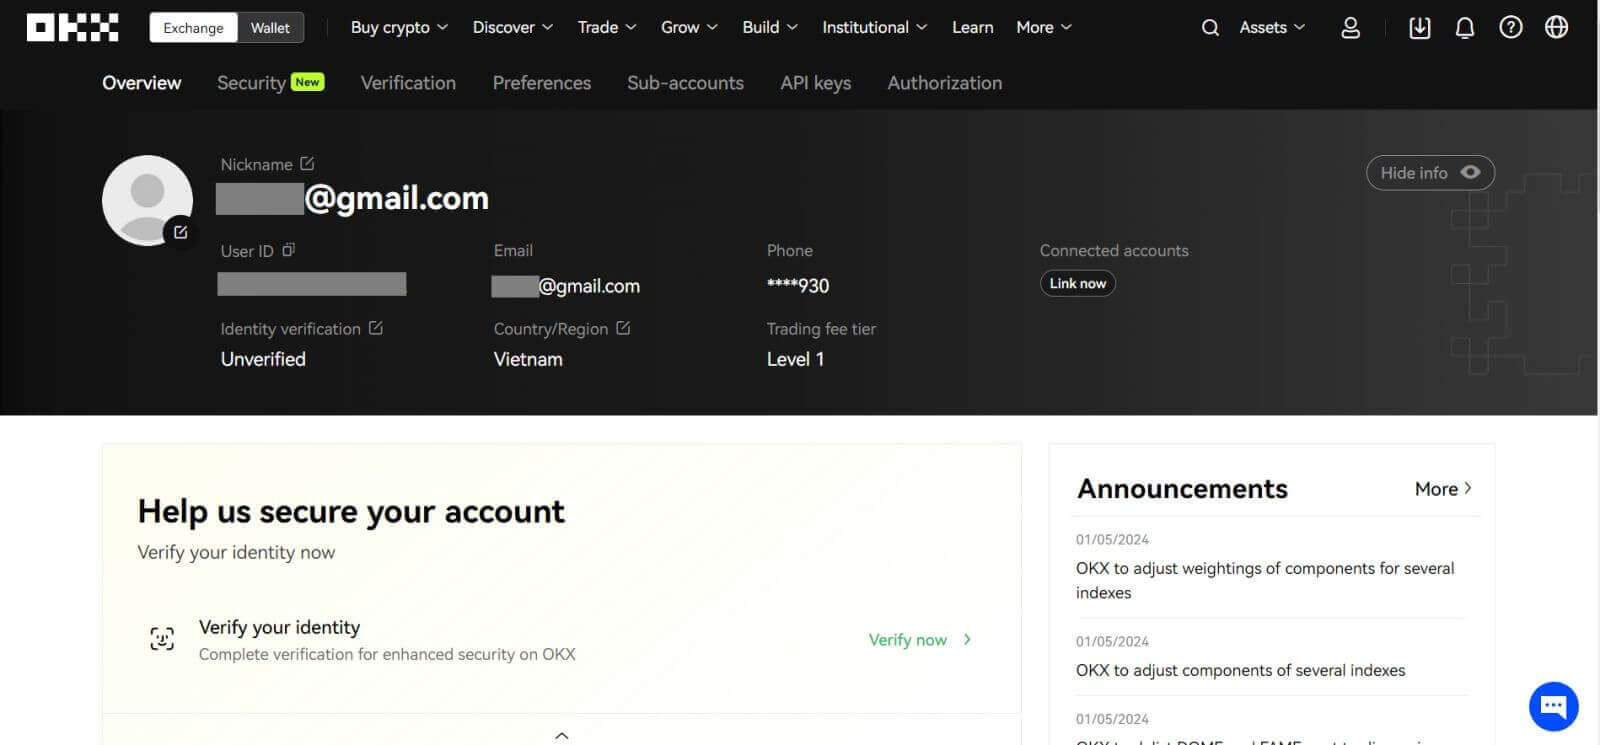
Register an Account on the OKX App
More than 70% of traders are trading the markets on their phones. Join them to react to every market movement as it happens.
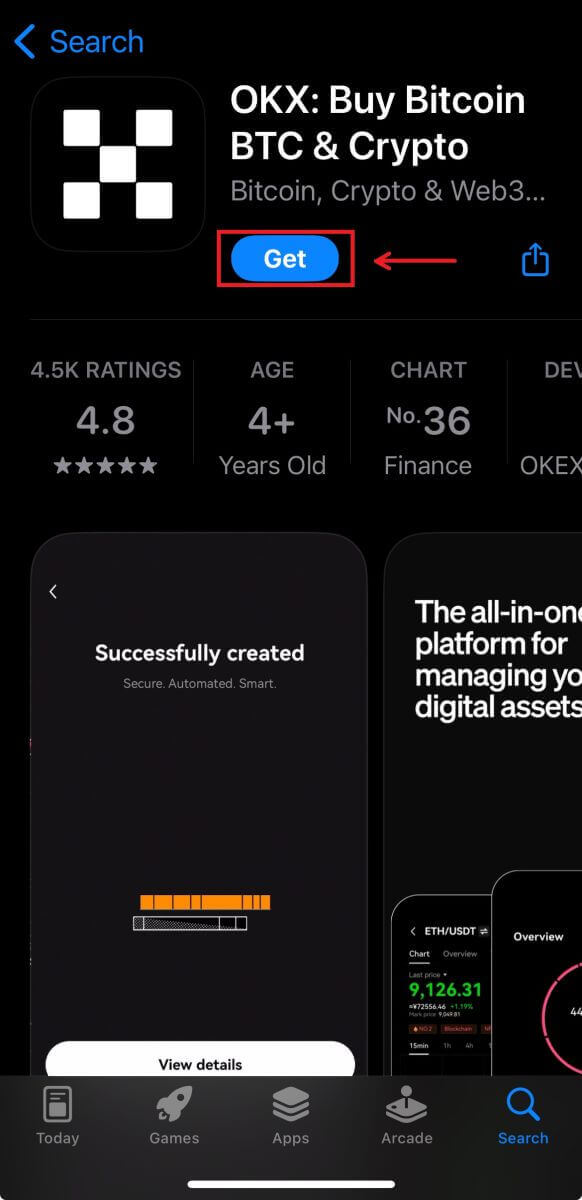
1. Install OKX app on Google Play or App Store.
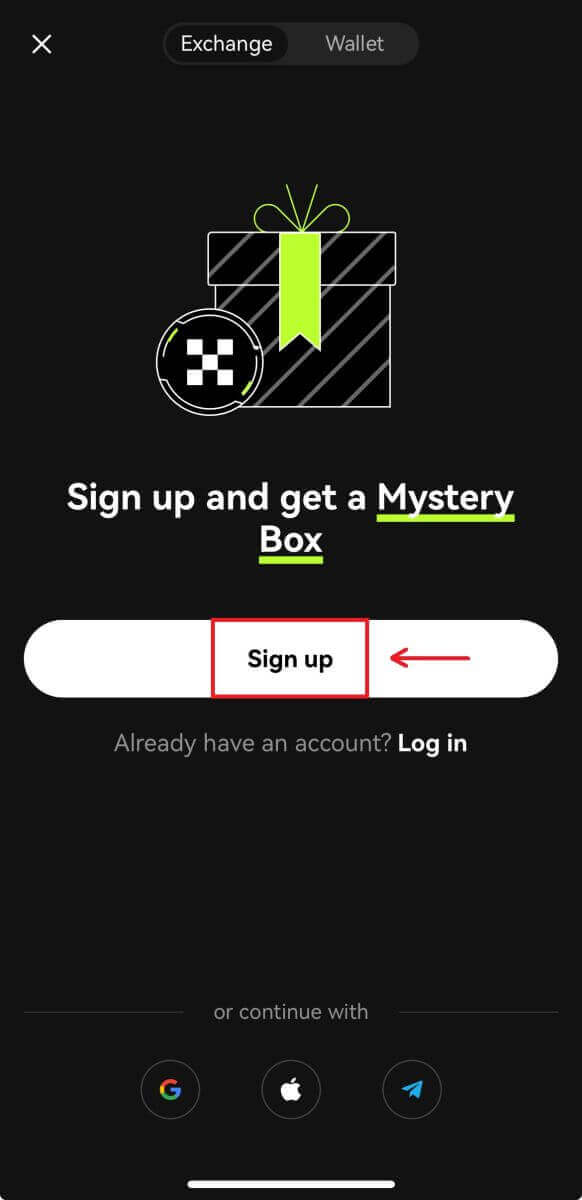
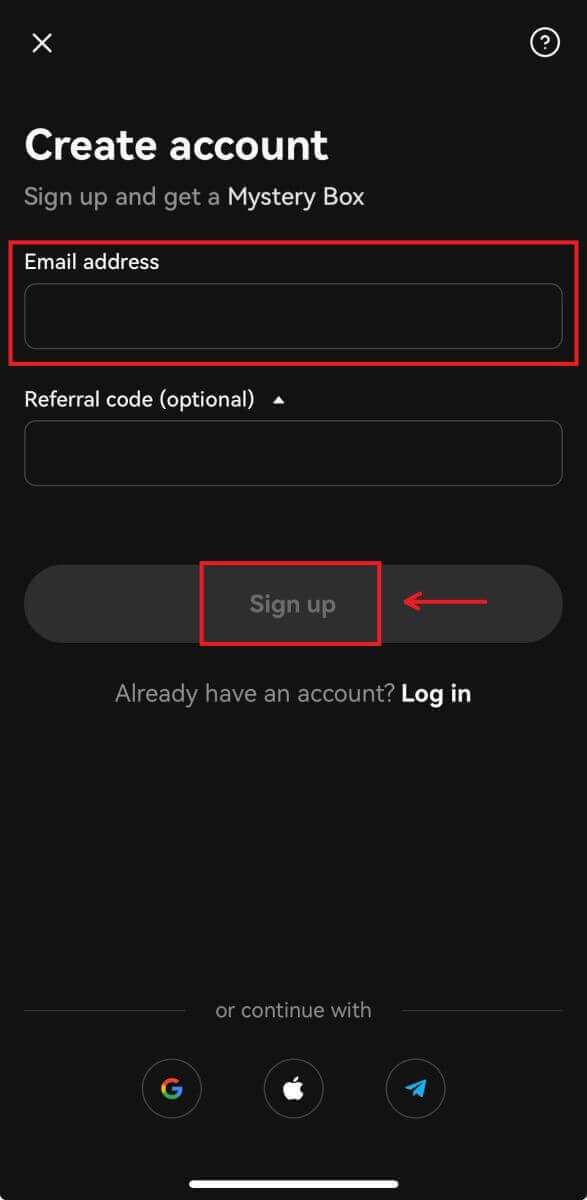
2. Click [Sign up].
3. Select a registration method, you can choose from Email, Google account, Apple ID, or Telegram.
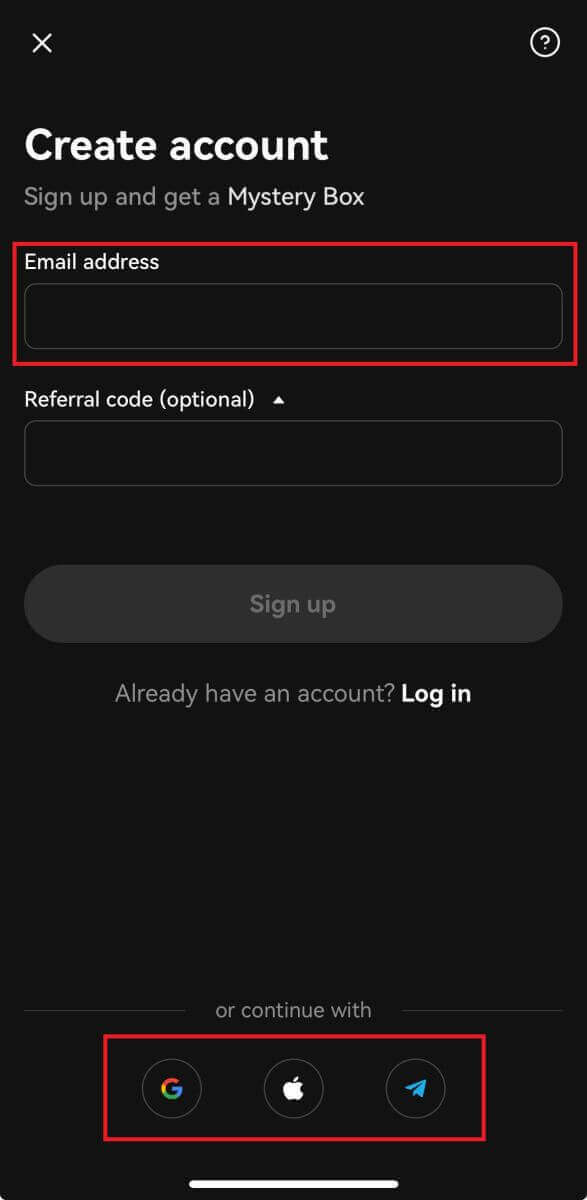
Sign up with your Email account:
4. Put in your Email then click [Sign up].
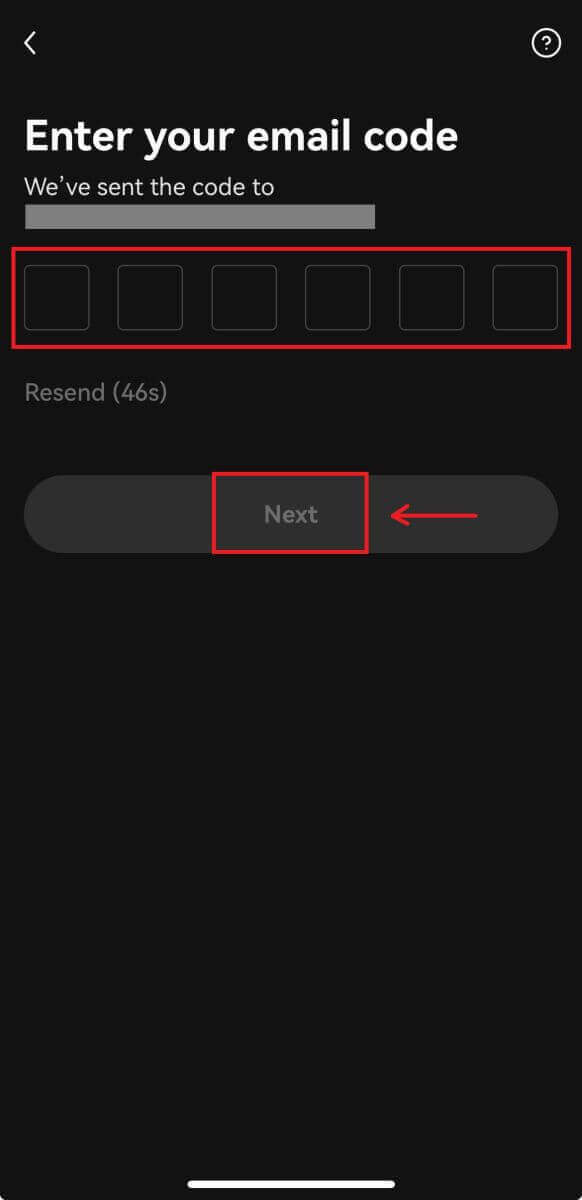
5. Enter the code that has been sent to your email, then click [Next].
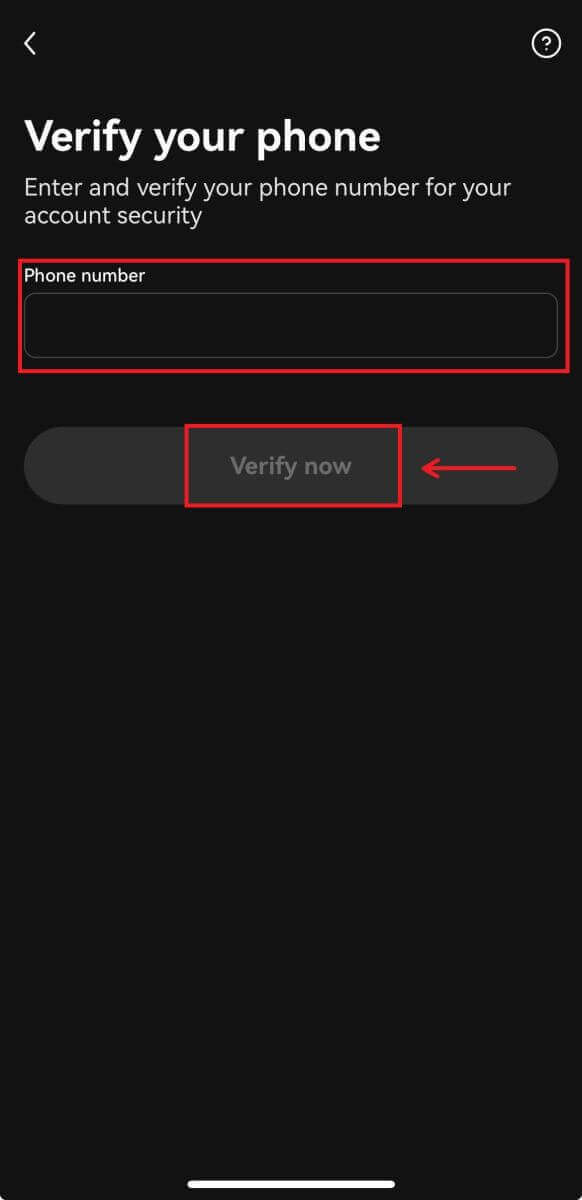
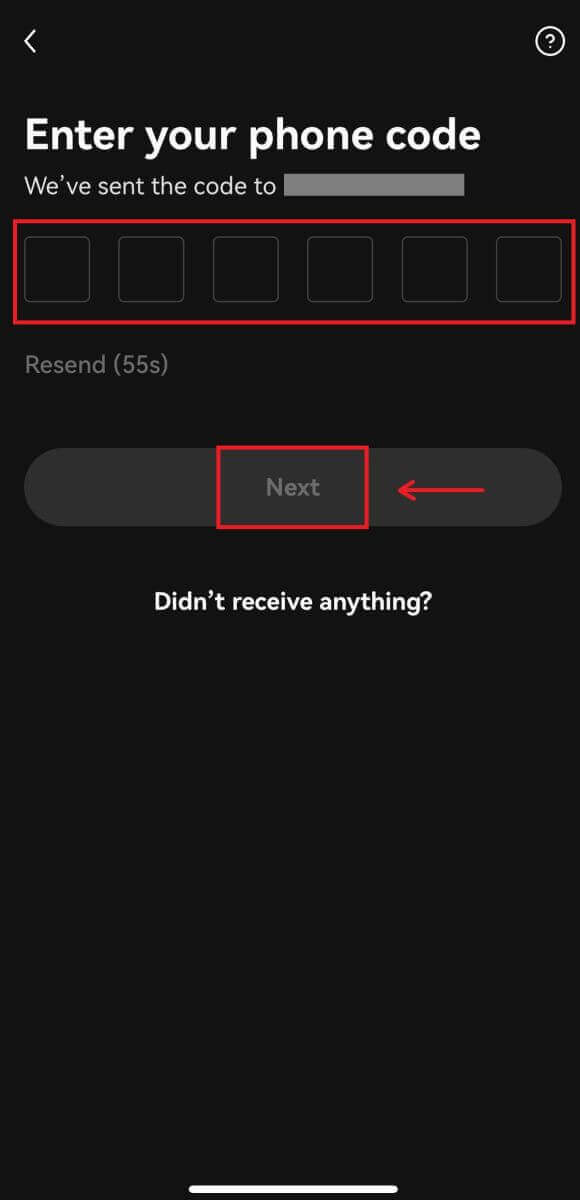
6. Enter your mobile number, click [Verify now]. Then put in the code and click [Next].
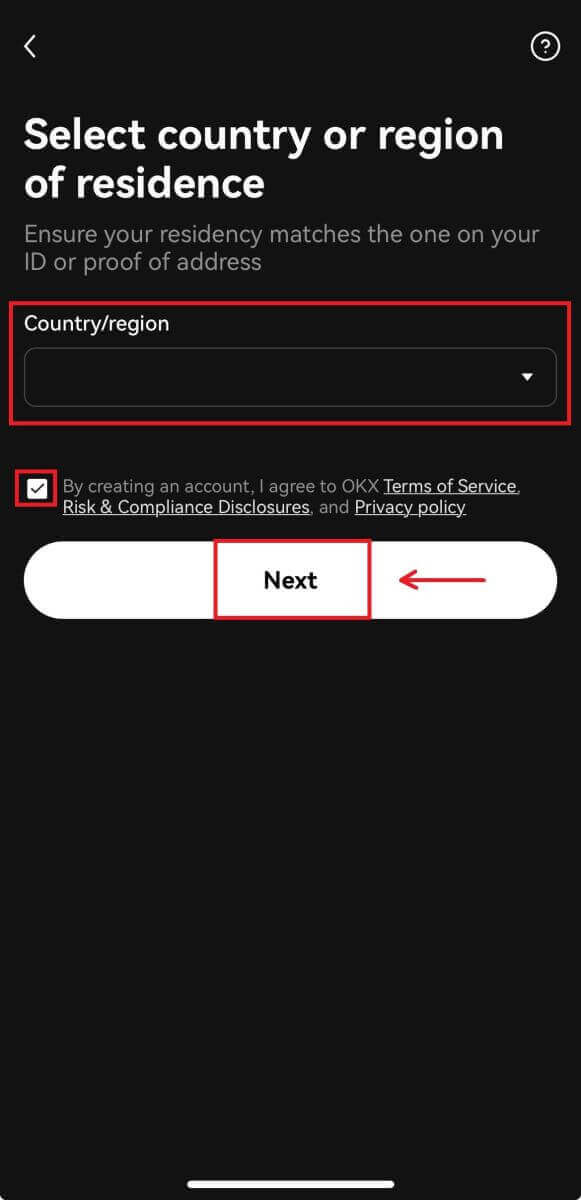
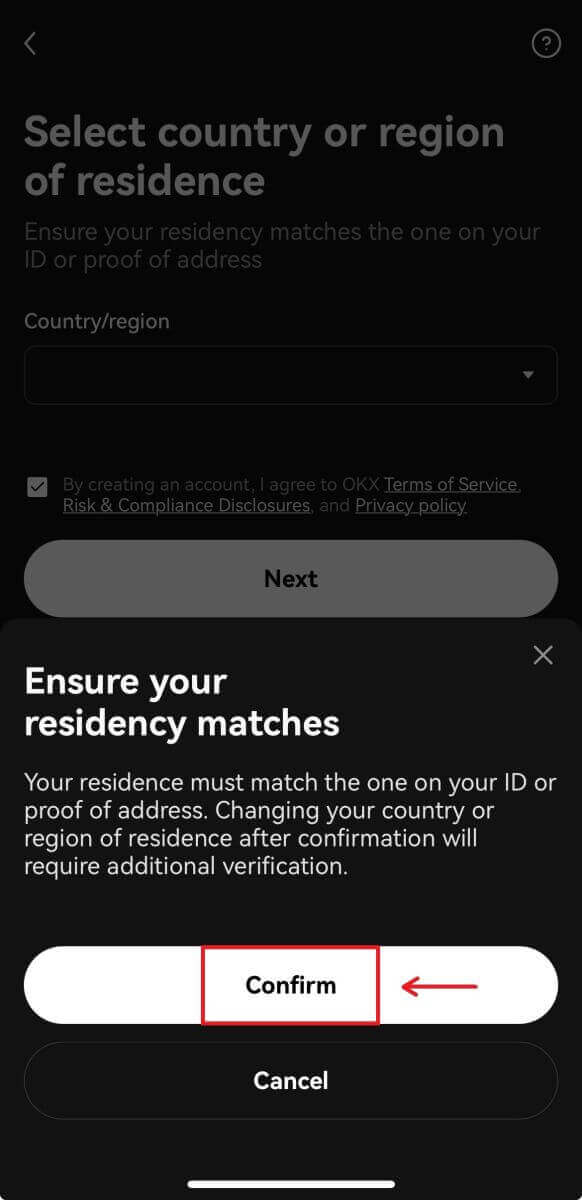
7. Choose your country of residence, tick to agree the terms and service, then click [Next] and [Confirm].
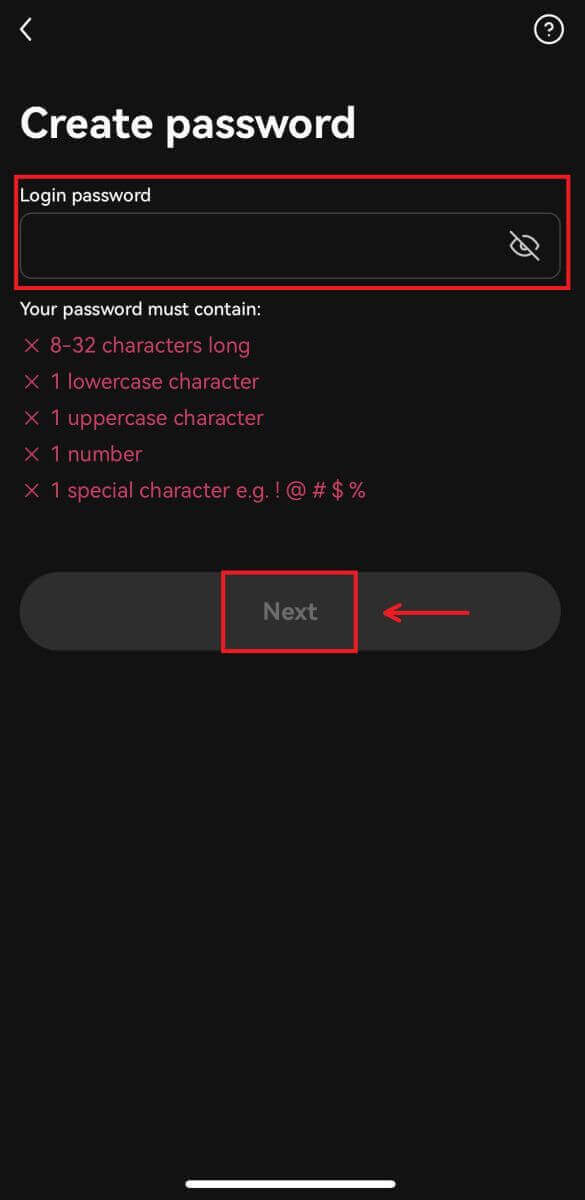
8. Choose your password. Then click [Next].
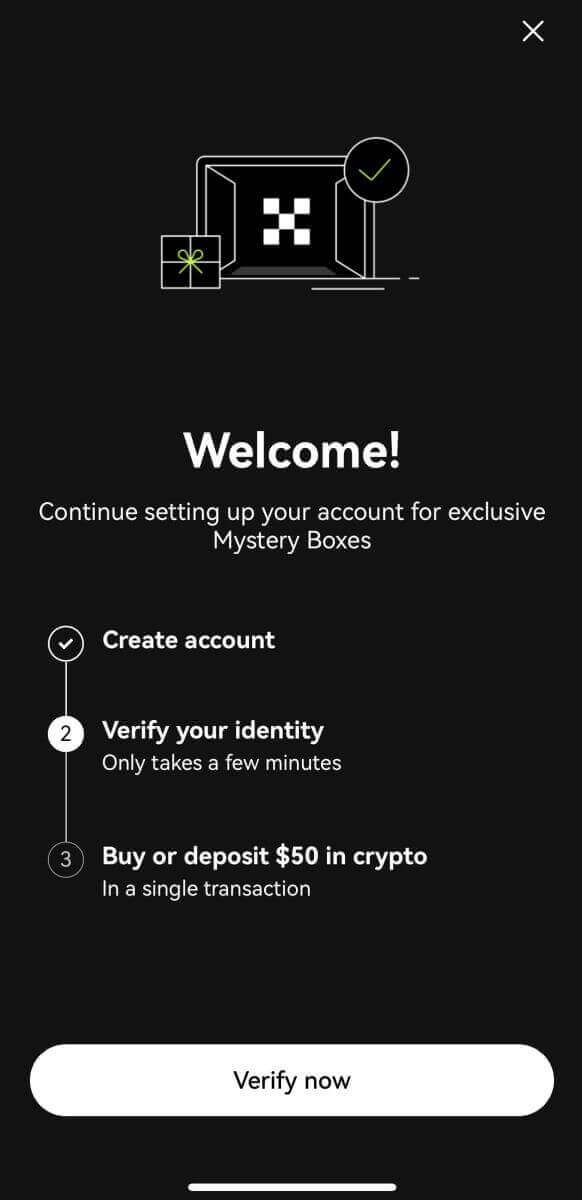
9. Congratulations! You have successfully created an OKX account.
Sign up with your Google account:
4. Select [Google]. You will be prompted to sign in to OKX using your Google account. You can use your existing accounts or use another one. Click [Continue] to confirm the account that you chose.
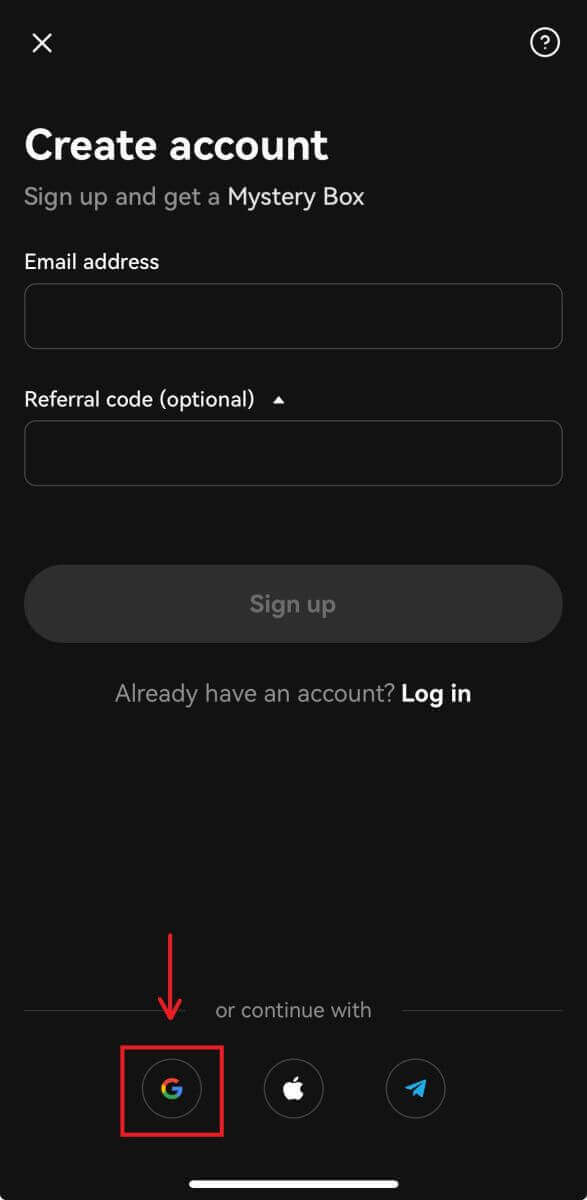
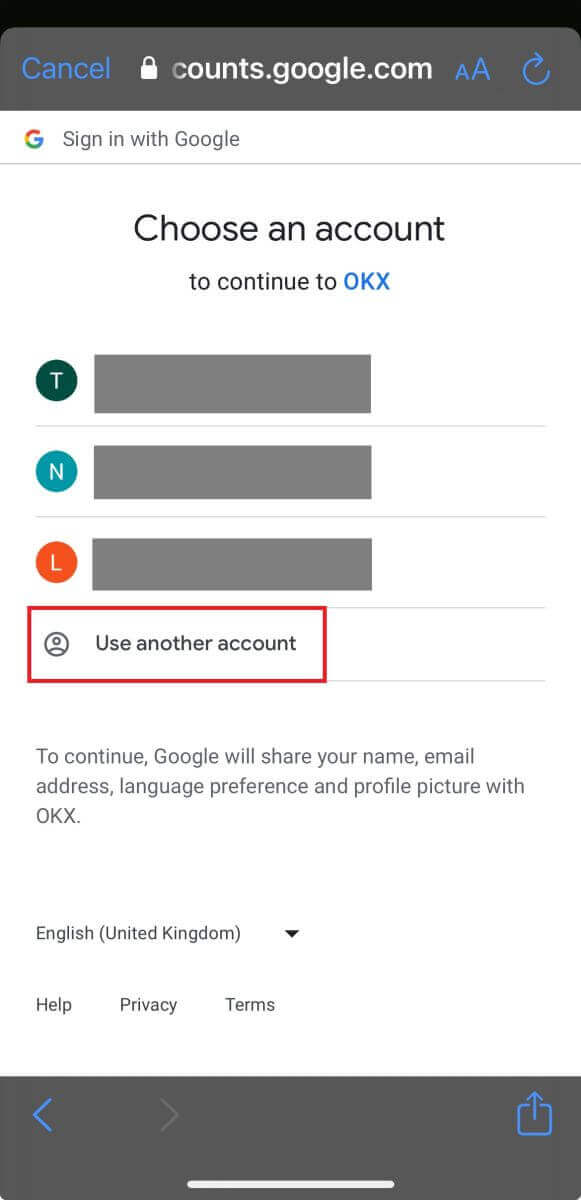
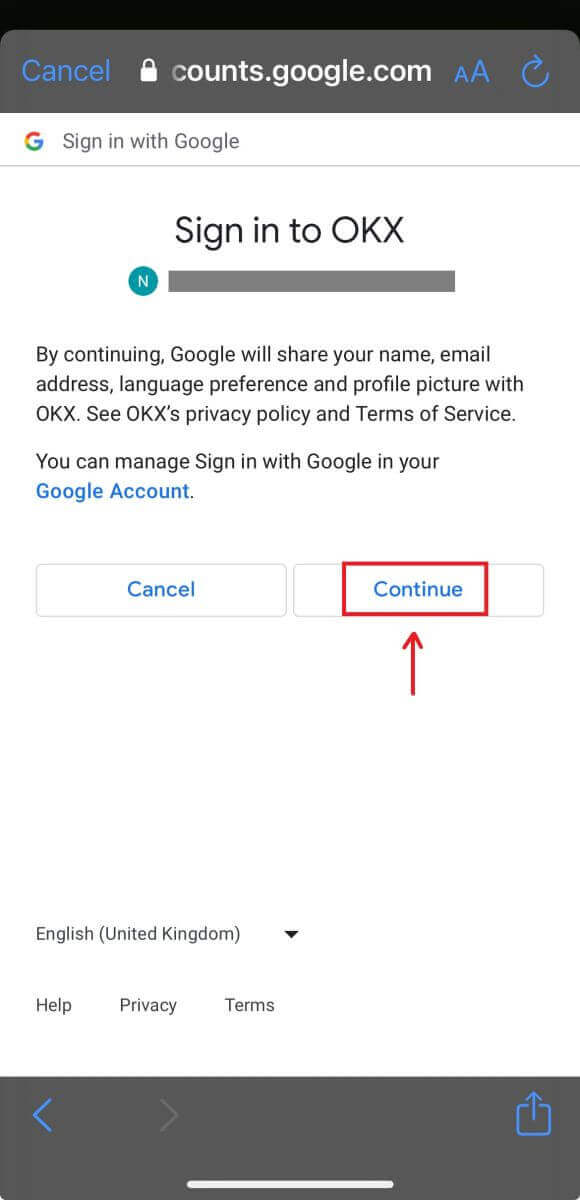
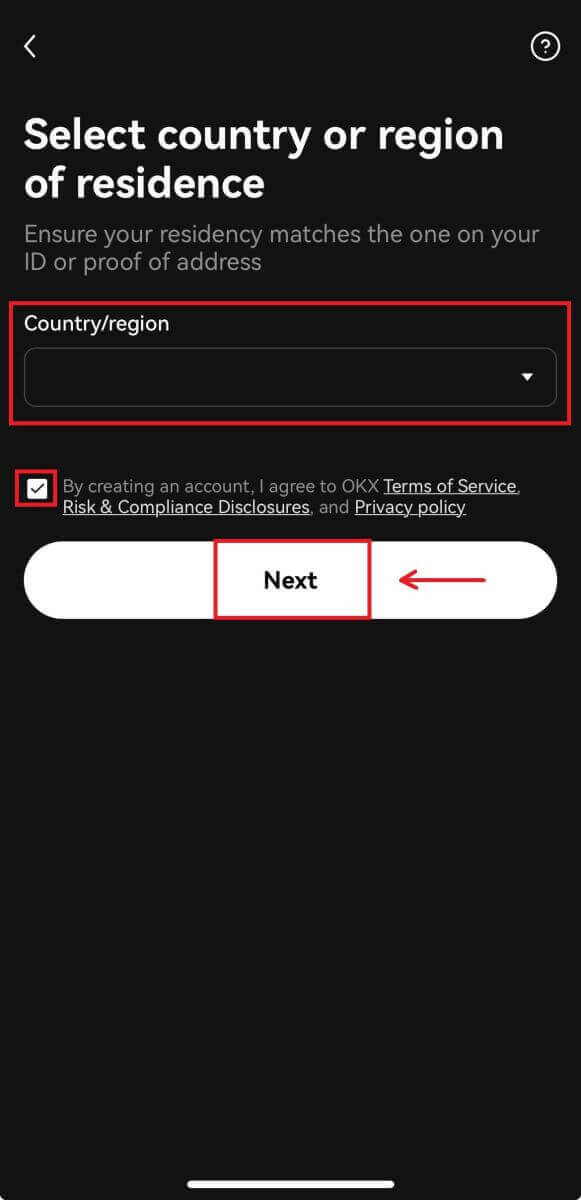
5. Choose your country of residence and you have successfully created an OKX account.
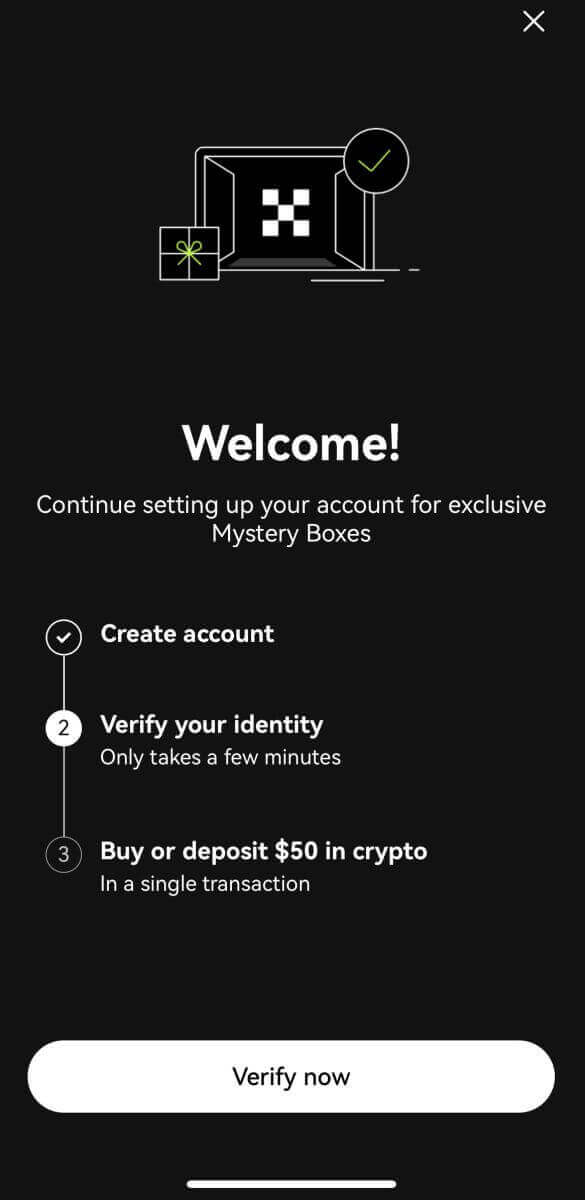
Sign up with your Apple account:
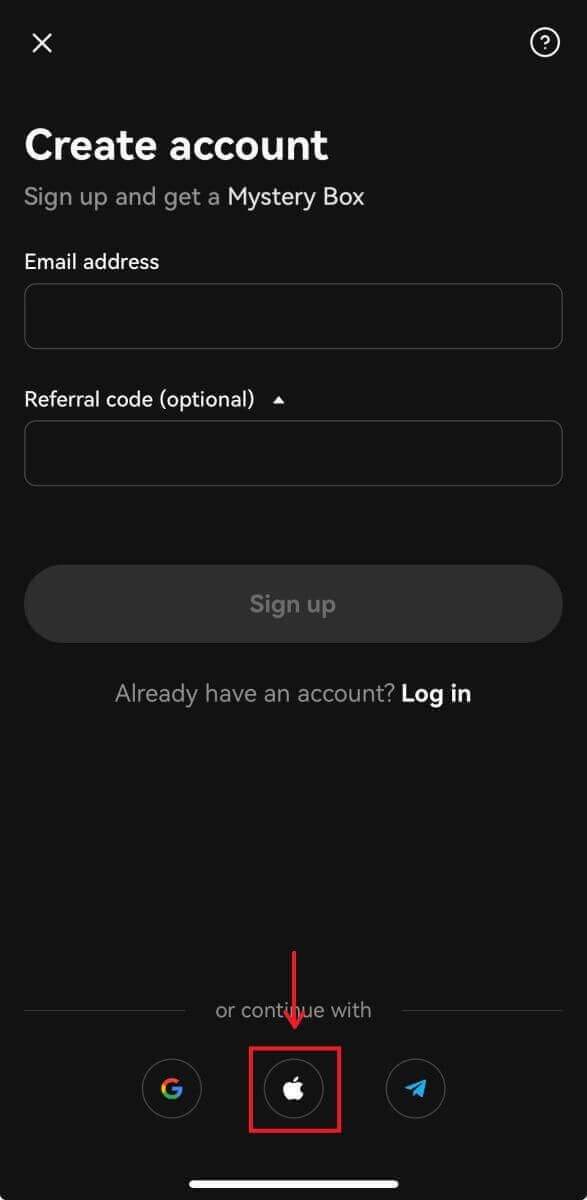
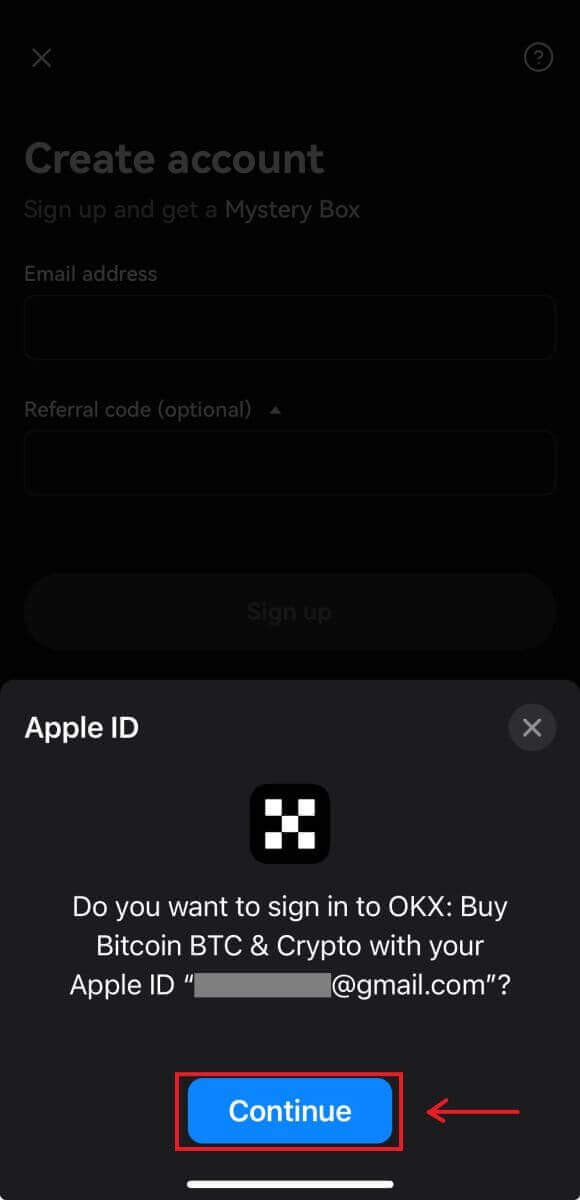
4. Select [Apple]. You will be prompted to sign in to OKX using your Apple account. Tap [Continue].
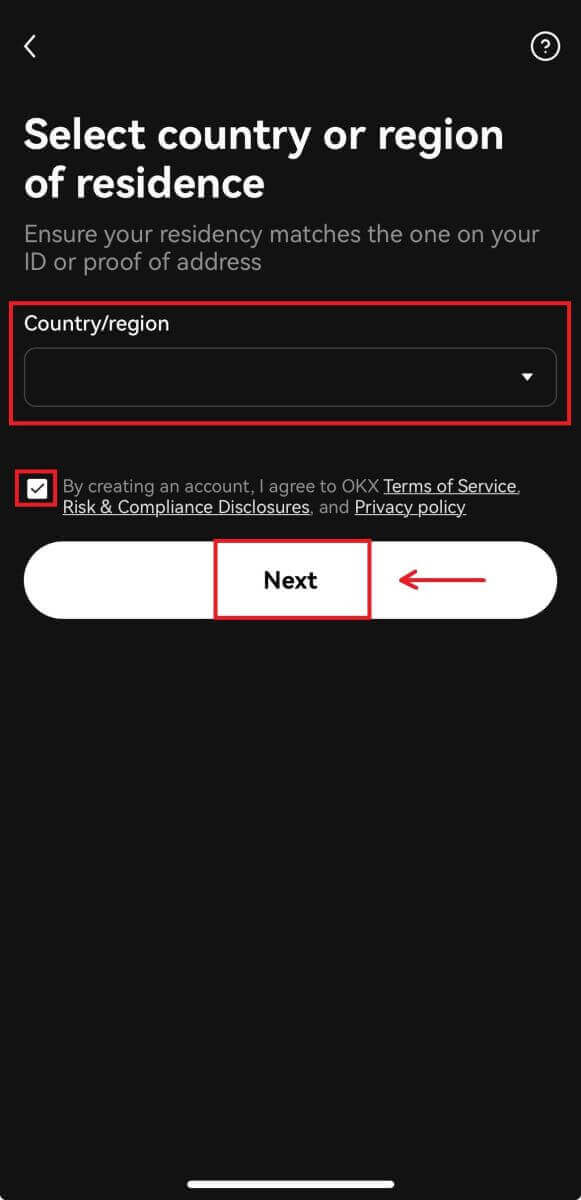
5. Choose your country of residence and you have successfully created an OKX account.
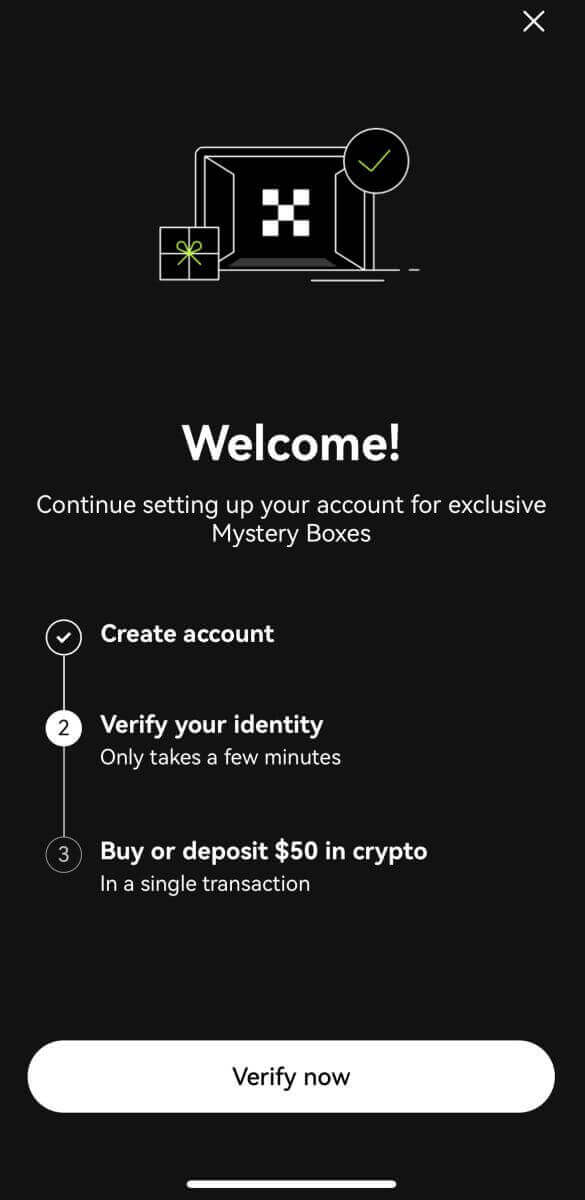
Sign up with your Telegram:
4. Select [Telegram] and click [Continue].
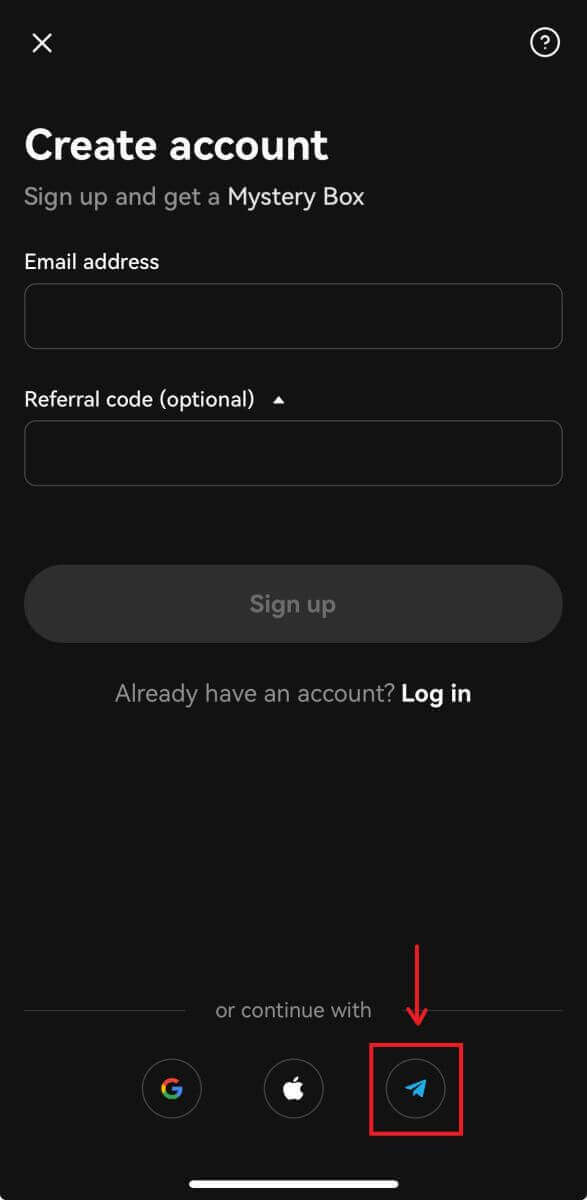
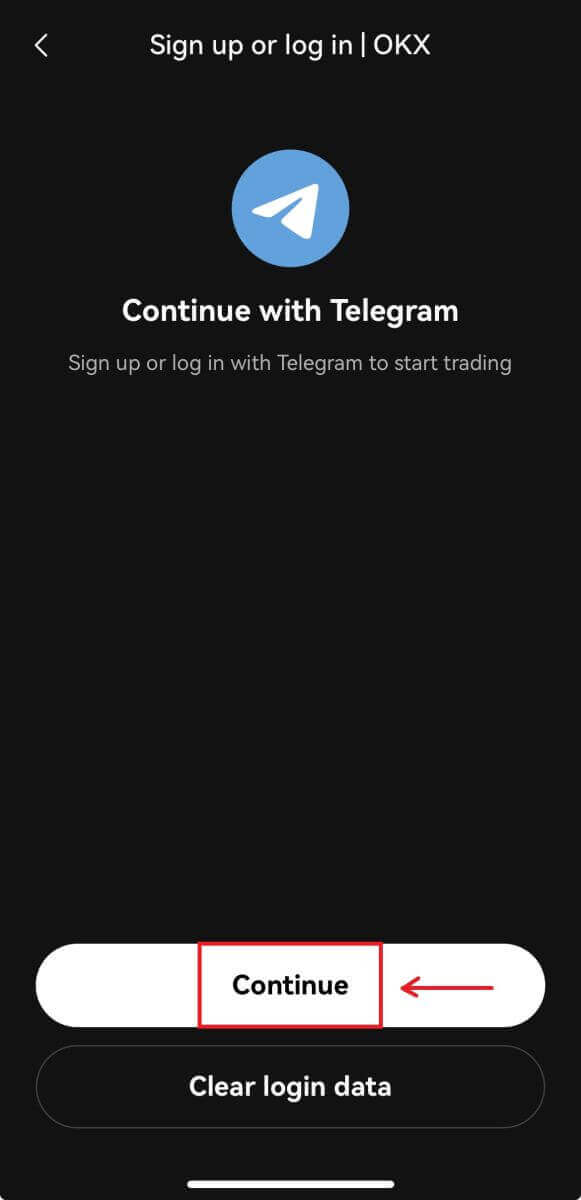
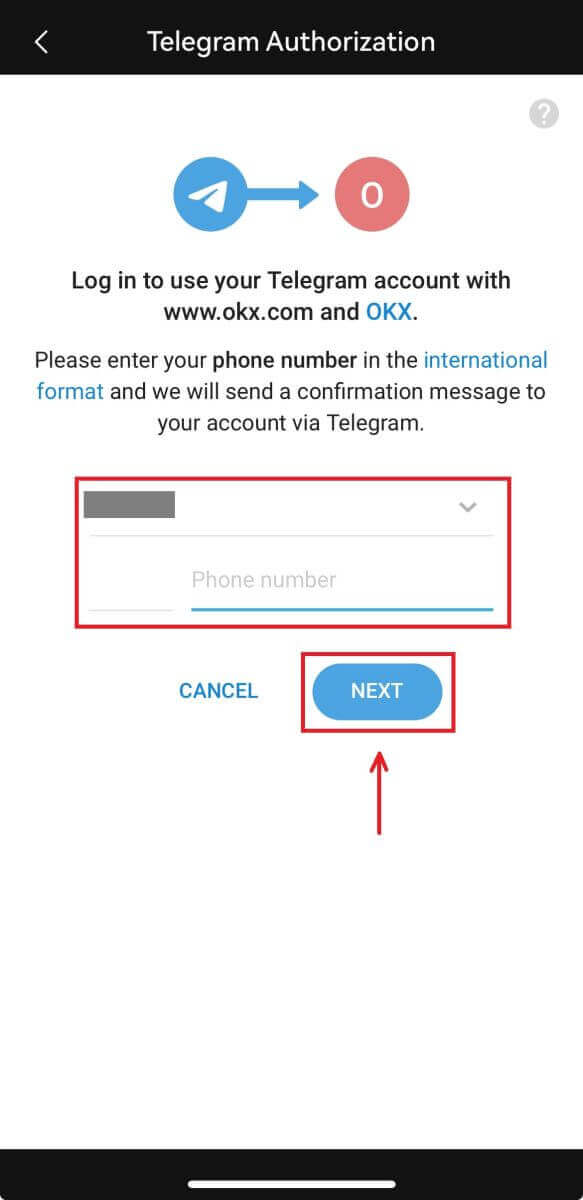
5. Enter your phone number and click [Next], then check the confirmation on your Telegram app.
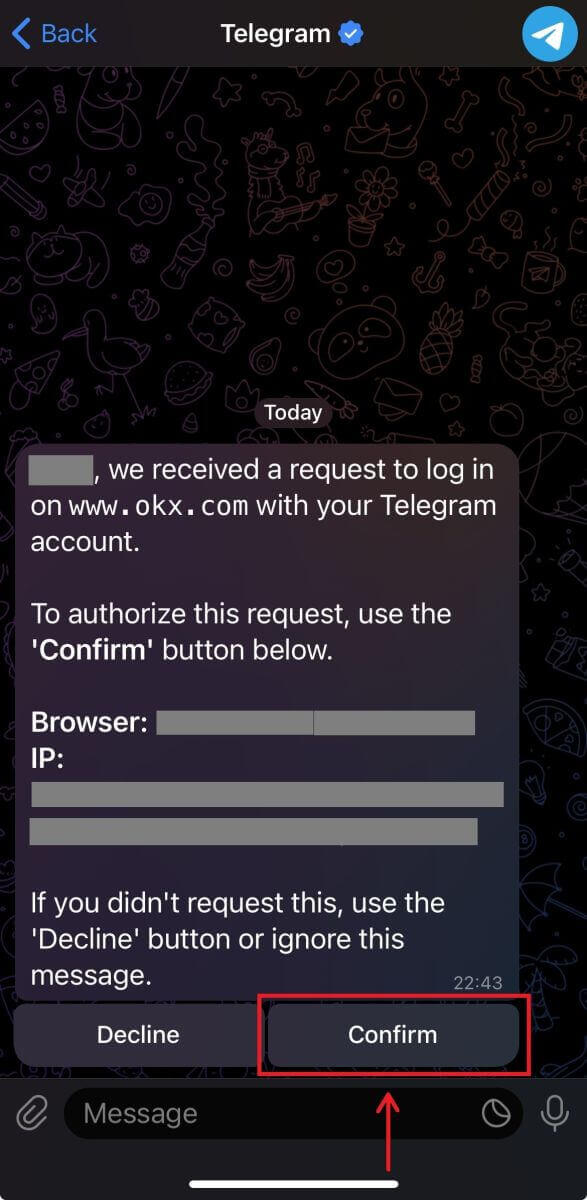
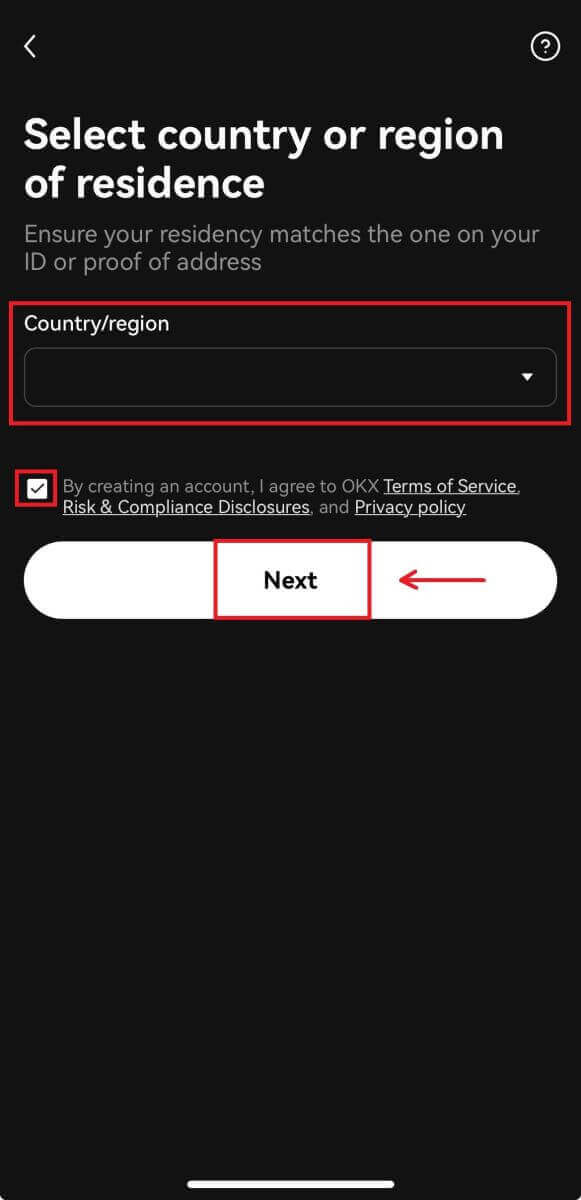
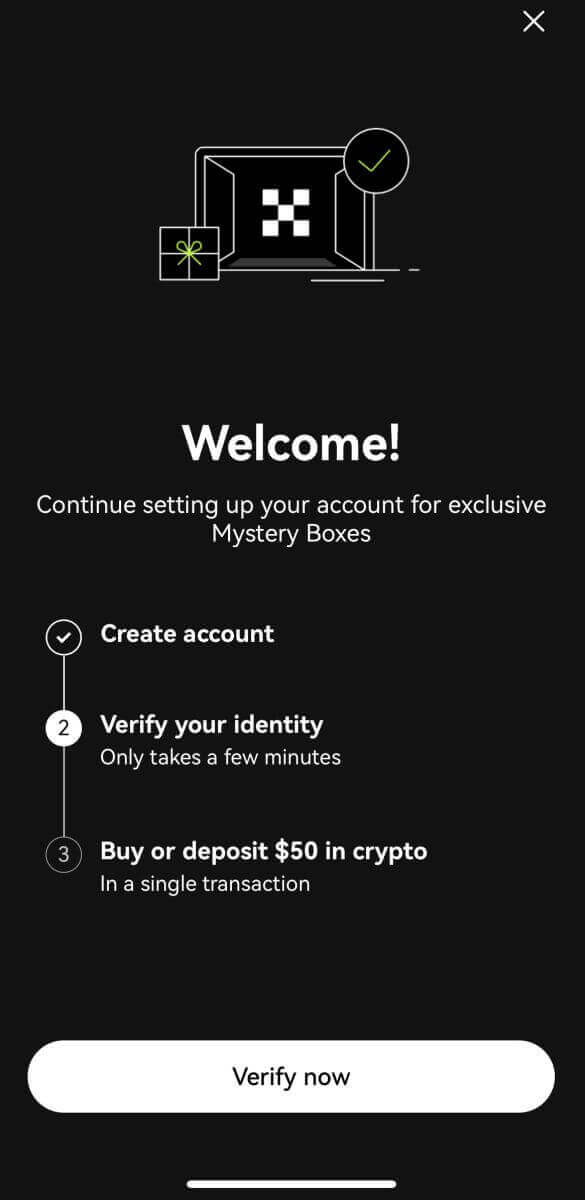
6. Choose your country of residence and you have successfully created an OKX account.
Frequently Asked Questions (FAQ)
My SMS codes aren’t working on OKX
Try these fixes first to check if you can get codes working again:
- Automate your mobile phone time. You can do it in your device’s general settings:
- Android: Settings General Management Date and time Automatic date and time
- iOS: Settings General Date and Time Set Automatically
- Sync your mobile phone and desktop times
- Clear OKX mobile app cache or desktop browser cache and cookies
- Try entering codes on different platforms: OKX website in desktop browser, OKX website in mobile browser, OKX desktop app, or OKX mobile app
How do I change my phone number?
On the app
- Open the OKX app, go to User Center, and select Profile
- Select User Center at the top left corner
- Find Security and select Security center before selecting Phone
- Select Change phone number and enter your phone number in the New phone number field
- Select Send code in both the SMS code sent to new phone number and SMS code sent to current phone number fields. We’ll send a 6-digit verification code to both your new and current phone numbers. Enter the code accordingly
- Enter the two-factor authentication (2FA) code to continue (if any)
- You’ll receive an email/SMS confirmation upon successfully changing your phone number
On the web
- Go to Profile and select Security
- Find Phone verification and select Change phone number
- Select the country code and enter your phone number in the New phone number field
- Select Send code in both the New phone SMS verification and Current phone SMS verification fields. We’ll send a 6-digit verification code to both your new and current phone numbers. Enter the code accordingly
- Enter the two-factor authentication (2FA) code to continue (if any)
- You’ll receive an email/SMS confirmation upon successfully changing your phone number
What is sub-account?
A sub-account is a secondary account connected to your OKX account. You can create multiple sub-accounts to diversify your trading strategies and reduce risks. Sub-accounts can be used for spot, spot leverage, contract trading, and deposits for standard sub-accounts, but withdrawals are not allowed. Below are the steps to create a sub-account.
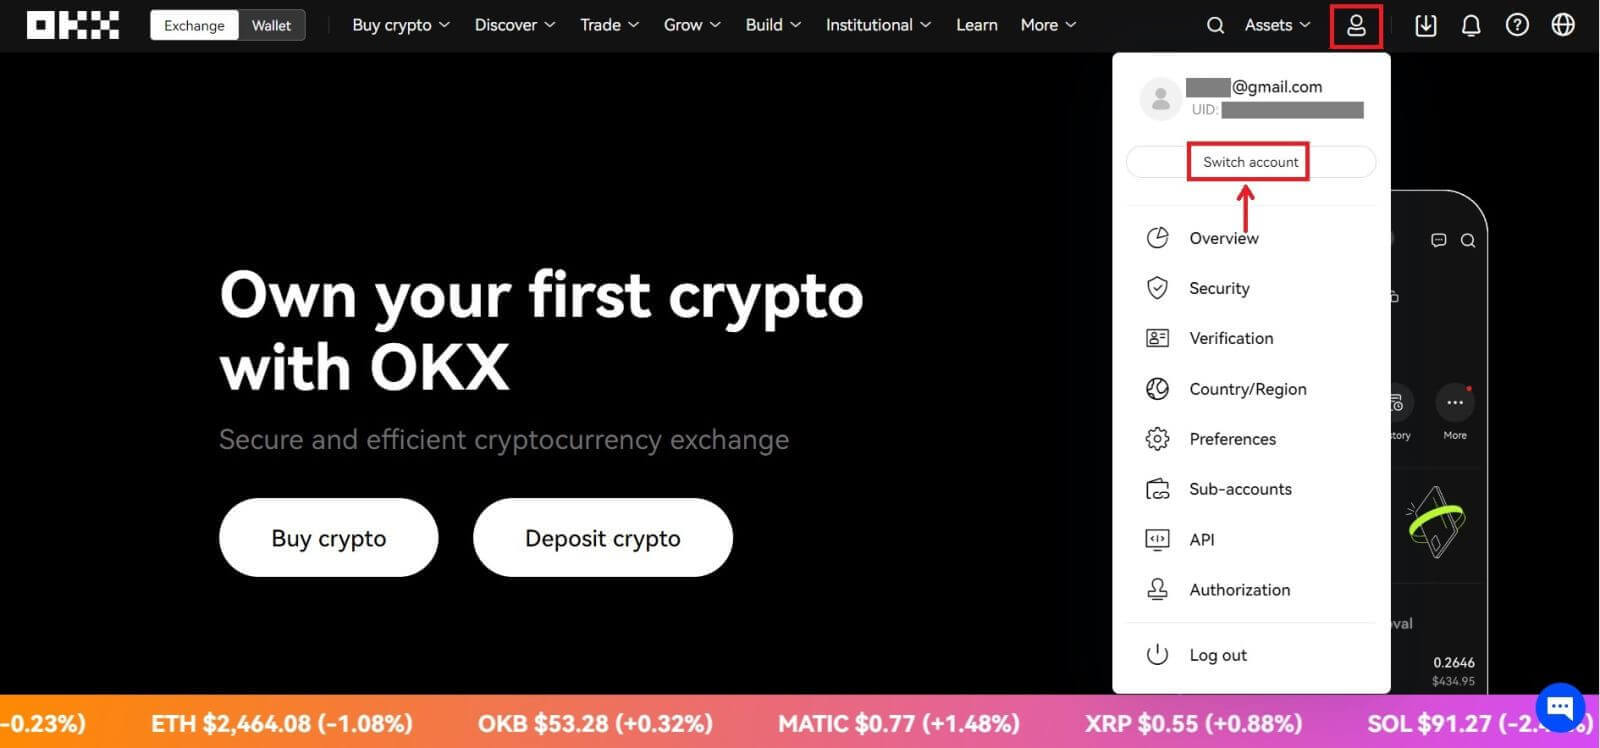
1. Open OKX website and login to your account, go to [Profile] and select [Sub-accounts].
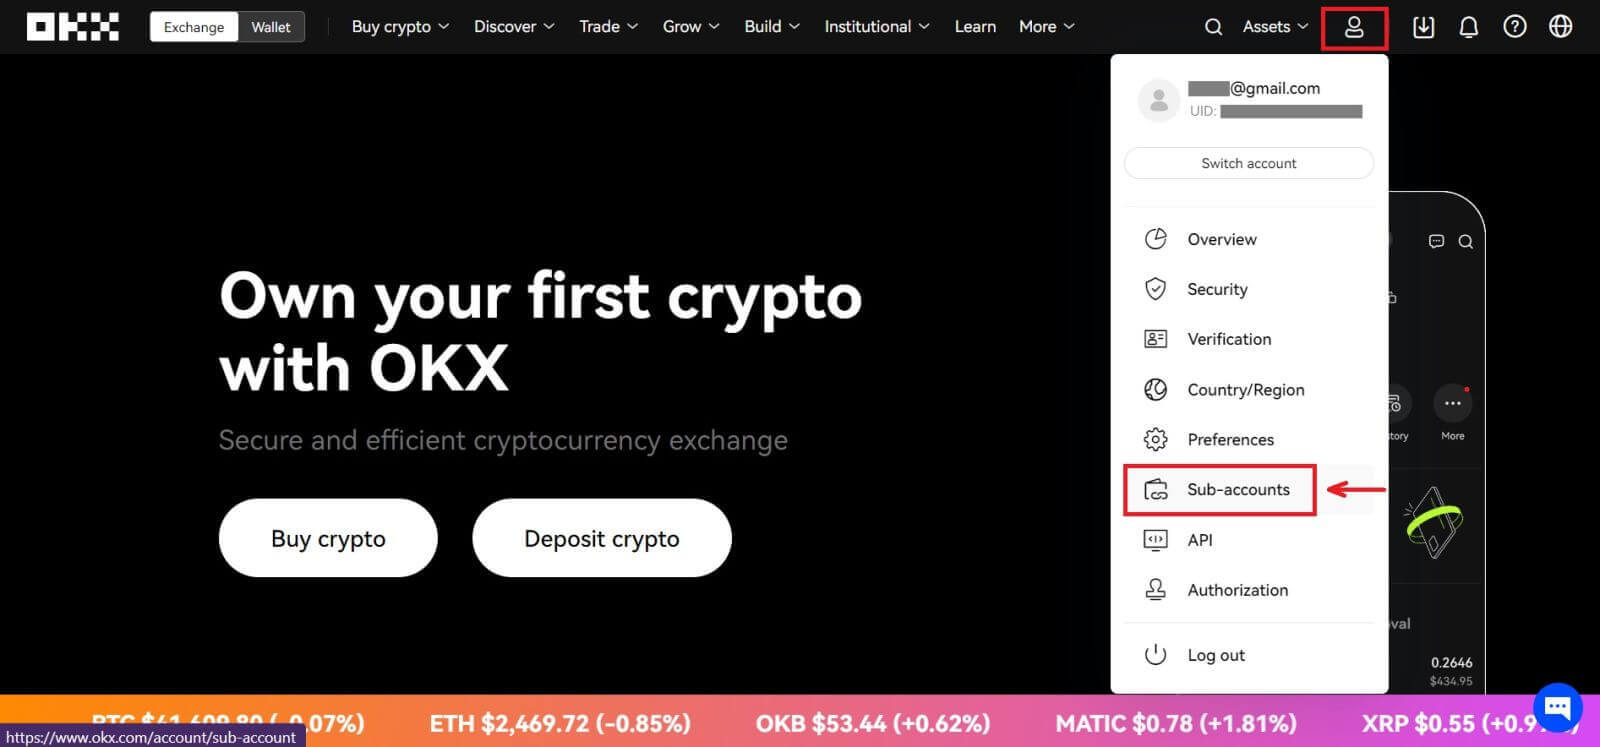 2. Select [Create sub-account].
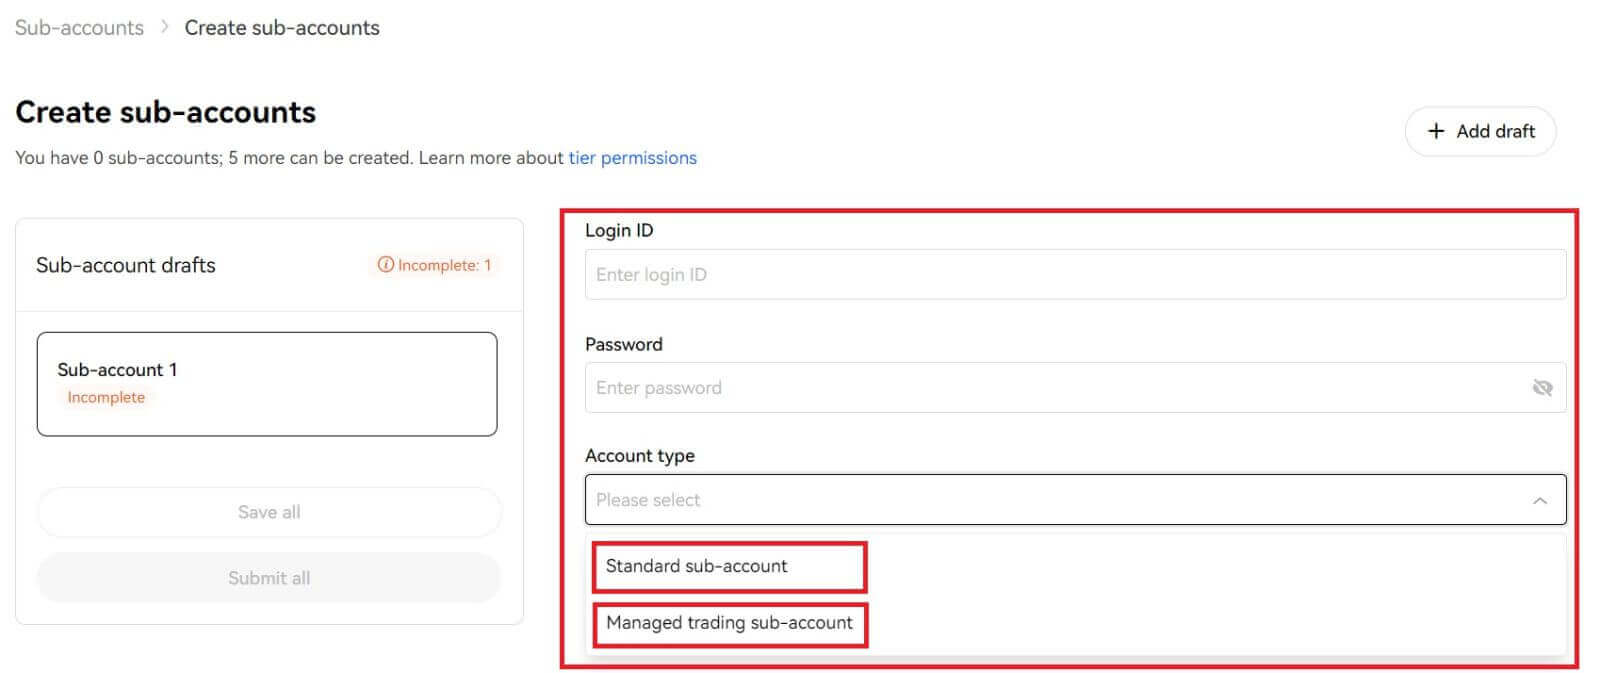
 3. Fill in "Login ID", "Password" and select "Account type"
- Standard sub-account: you are able to make Trading settings and enable Deposits to this sub-account
- Managed trading sub-account: you are able to make Trading settings
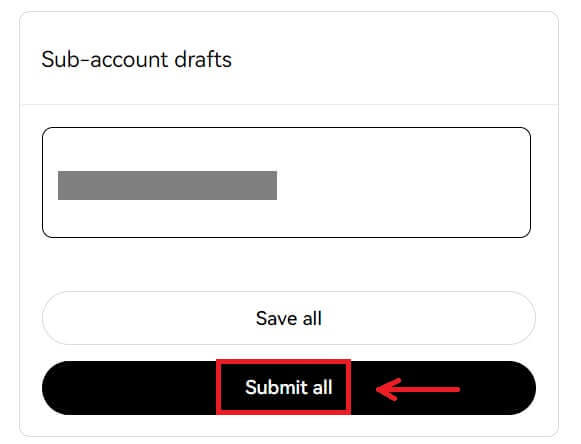
4. Select [Submit all] after confirming the information.
Note:
- Sub-accounts will inherit the main account’s tier level at the same time of creation and it will update daily according to your main account.
- General users (Lv1 - Lv5) can create a maximum of 5 sub-accounts; for other level users, you can view your tier permissions.
- Sub-accounts can only be created on the web.
How to Verify Account on OKX
How to Complete Identity Verification on OKX
Where can I get my account verified?
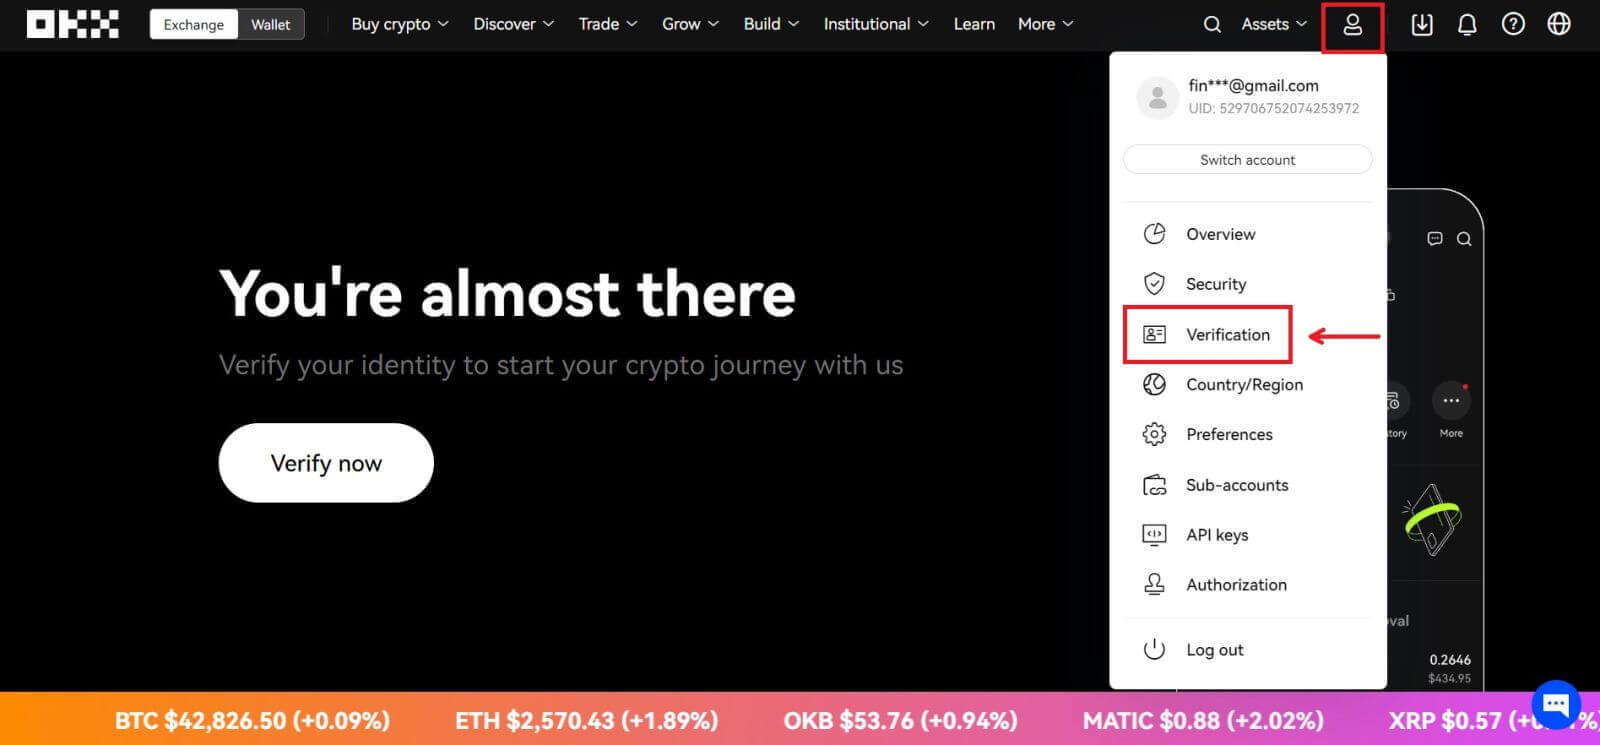
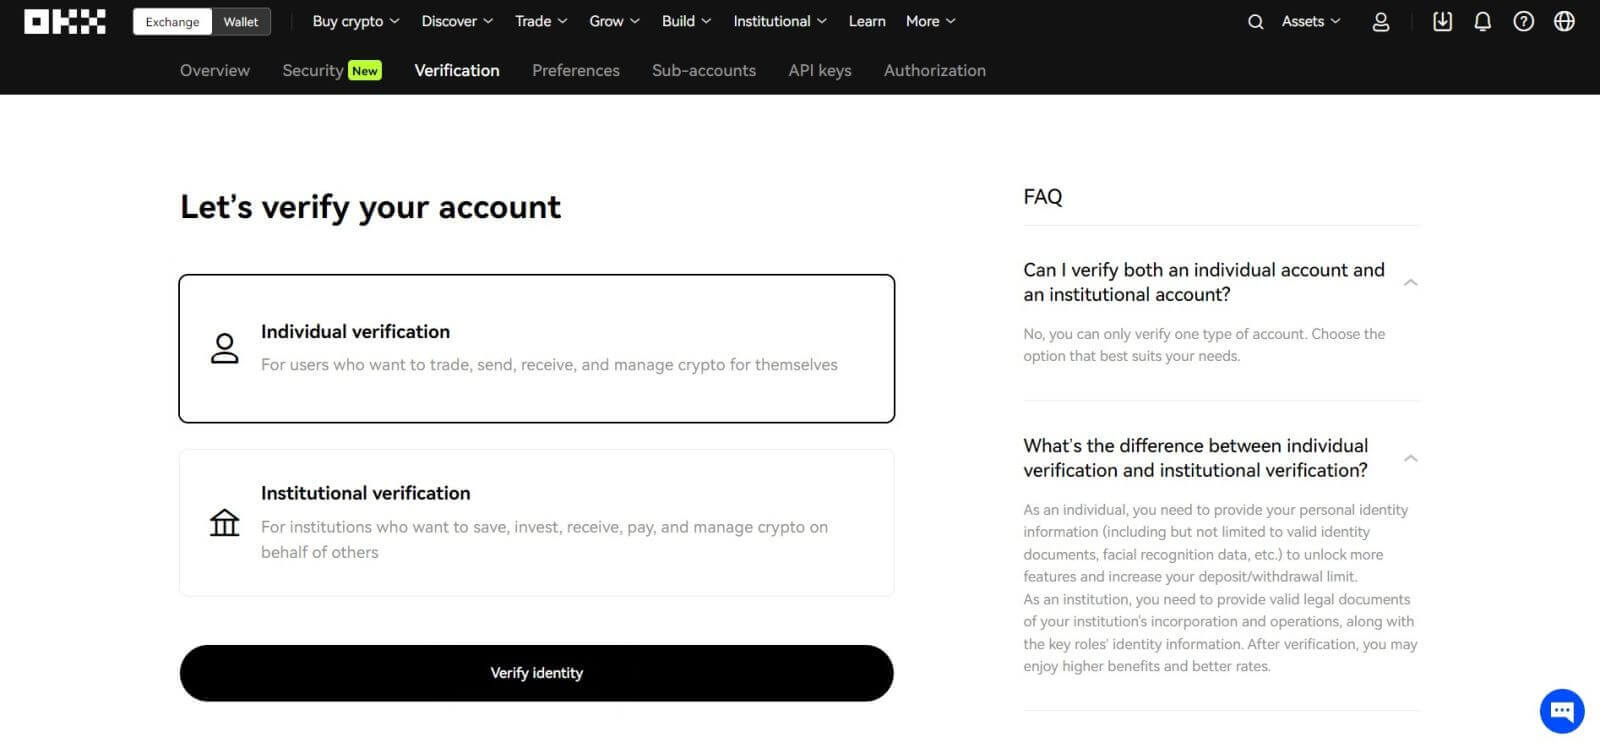
You can access the Identity Verification from your Avatar - [Verification].
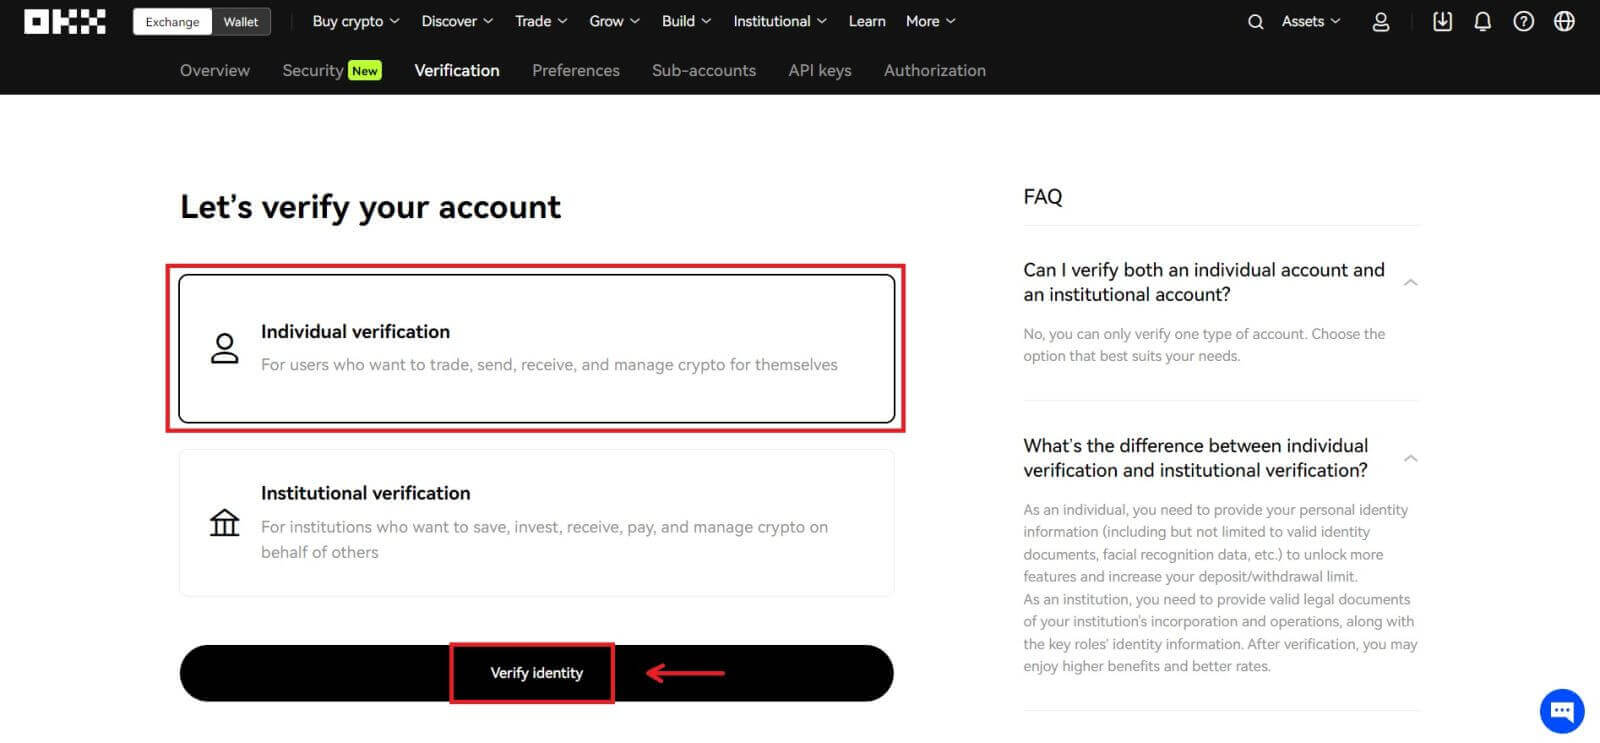
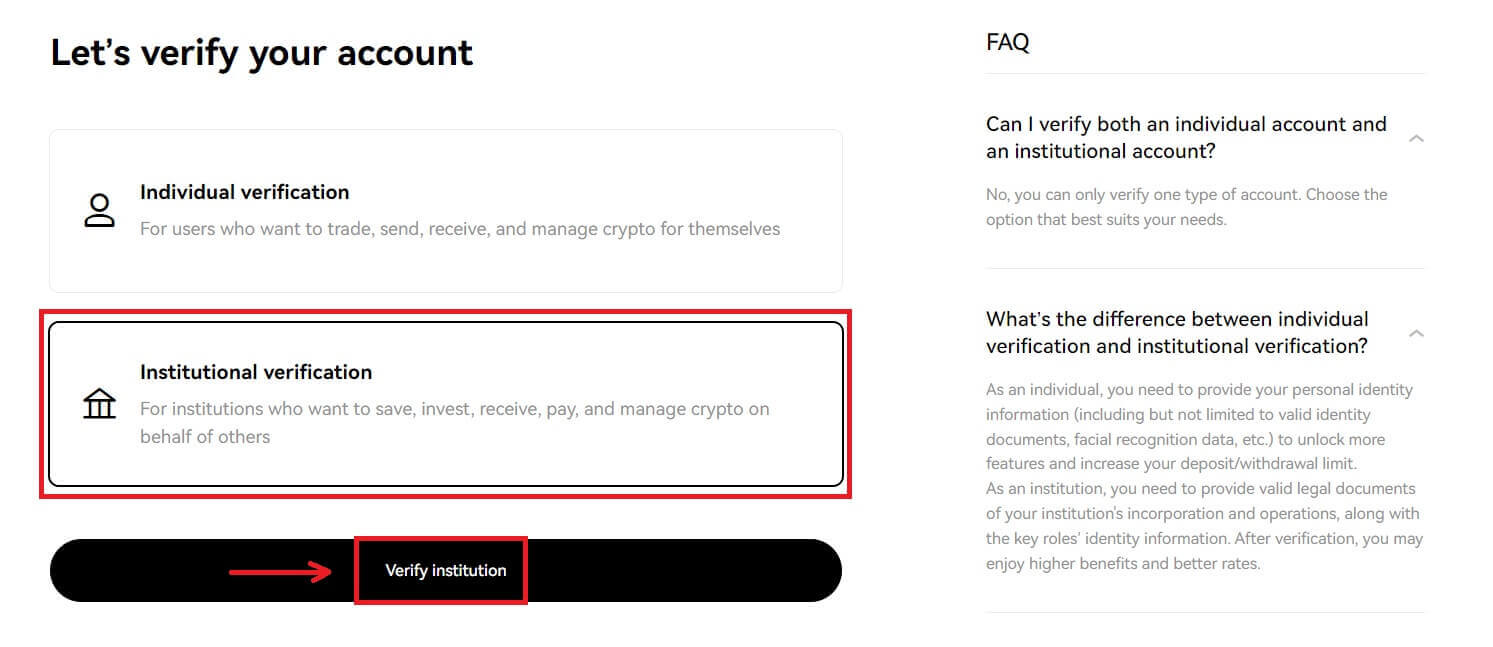
After going to the Verification page, you can choose between [Individual verification] and [Institutional verification].
How to Verify Account for Individuals? A step-by-step guide
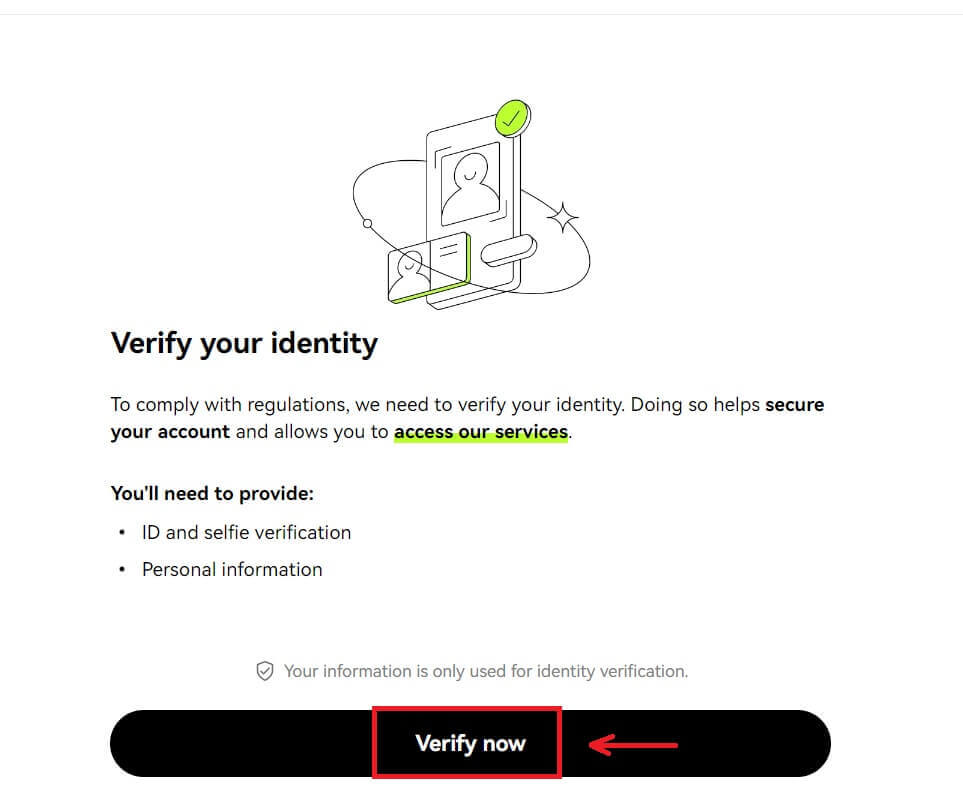
1. Choose [Individual verification]. Click [Verify identity] - [Verify now].
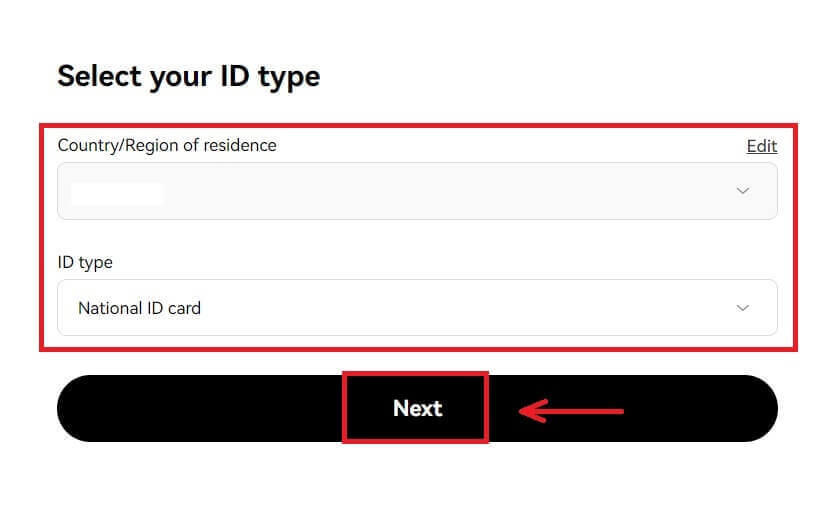
2. Choose your country of residence and ID type, then click [Next].
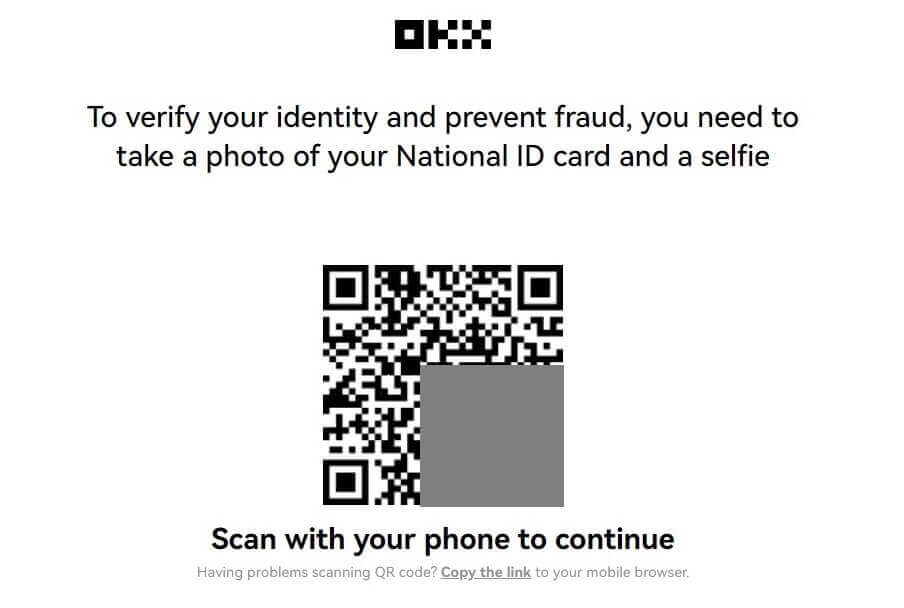
3. Scan the QR code with your phone.
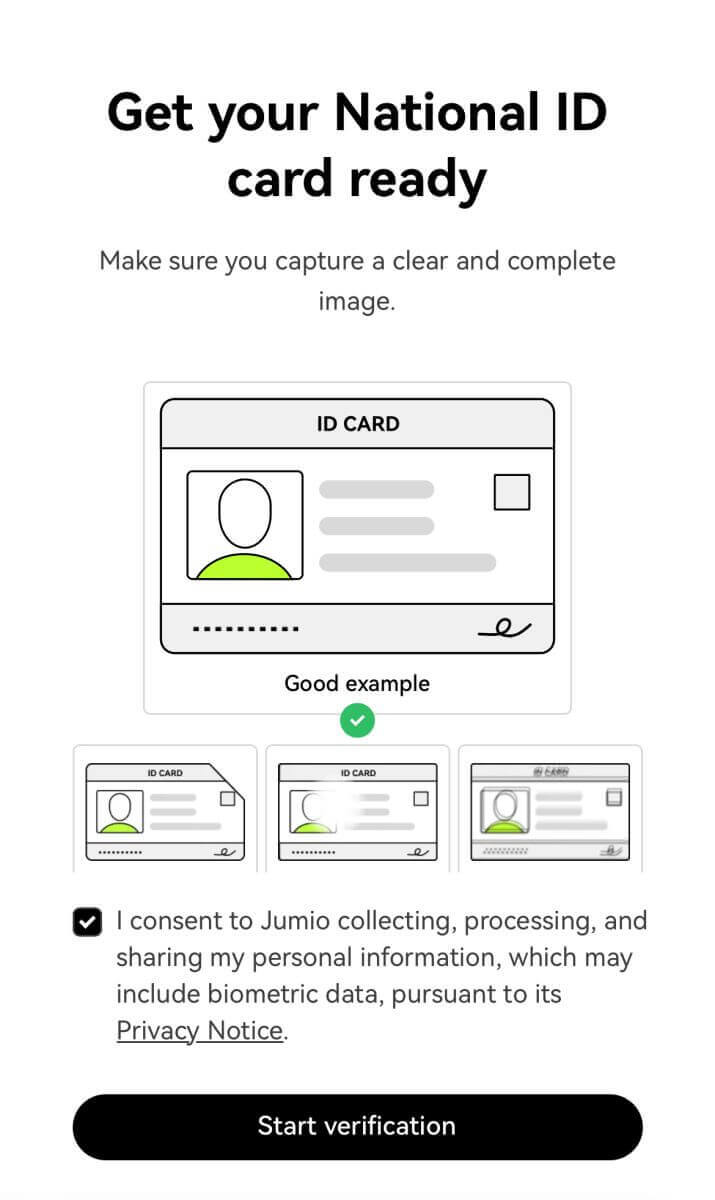
4. Follow the instructions and upload the required document.
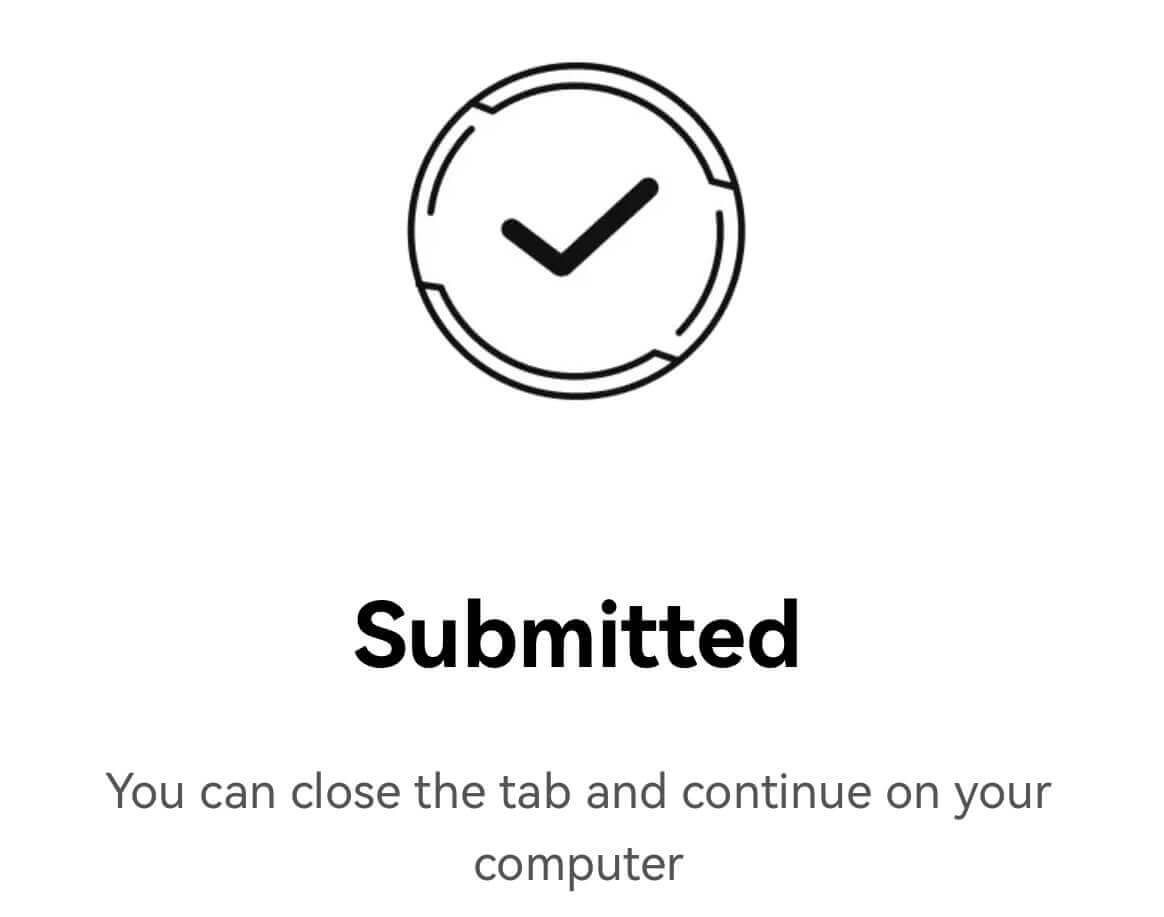
5. The review process can take up to 24 hours. You’ll be notified once the review is completed.
How to Verify Account for Institutional? A step-by-step guide
1. Choose [Institutional verification]. Click [Verify institution] - [Verify now].
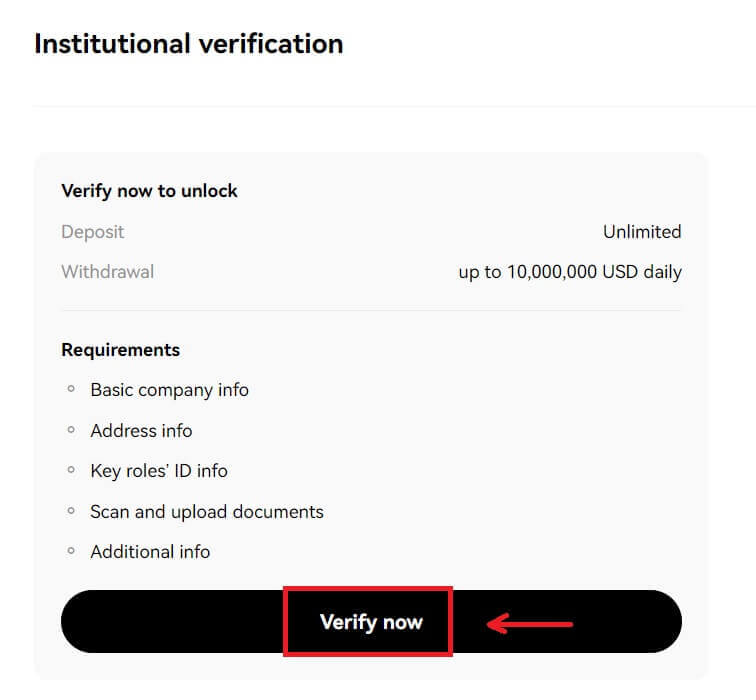
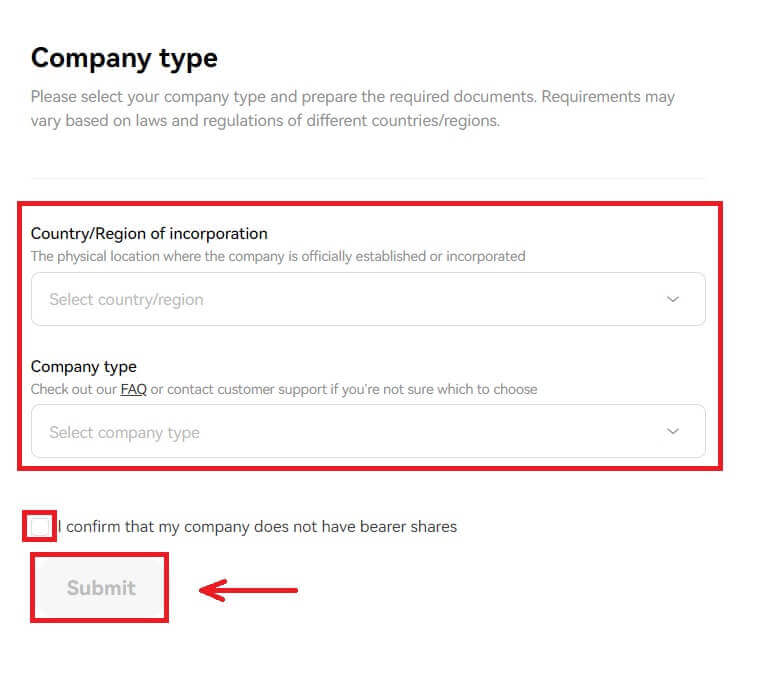
2. Fill in the information for "Company type", tick to agree the terms and click [Submit].
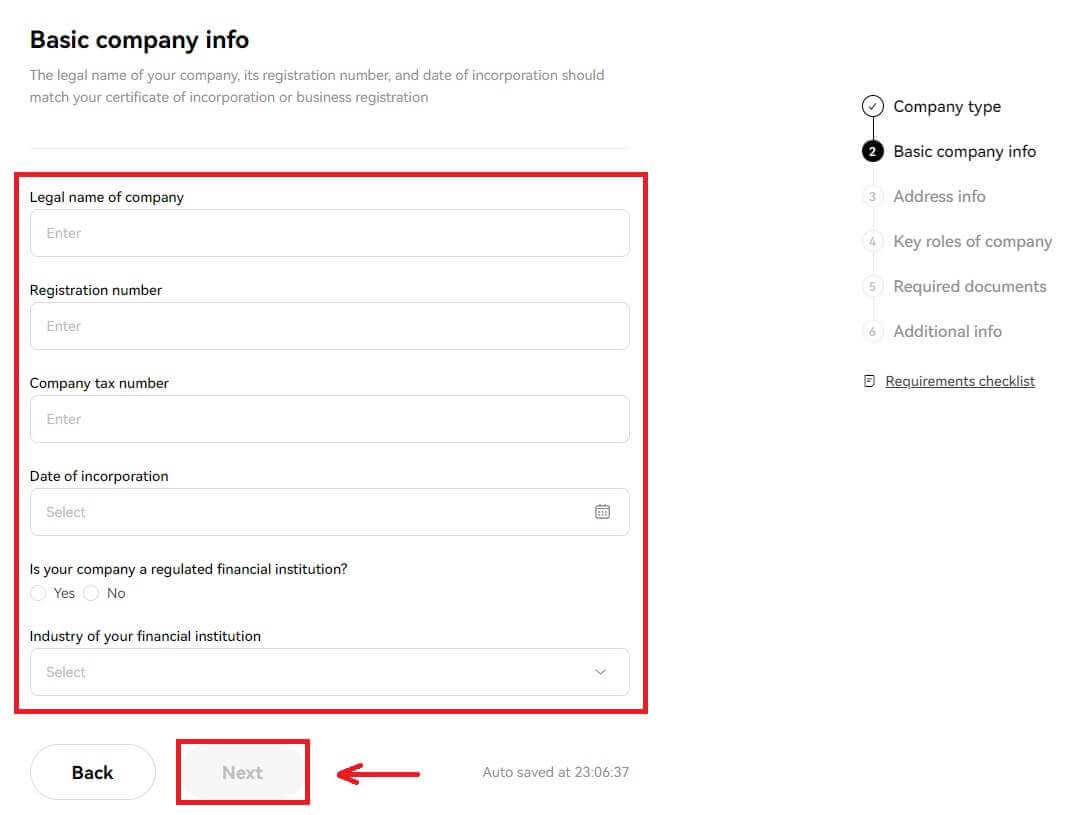
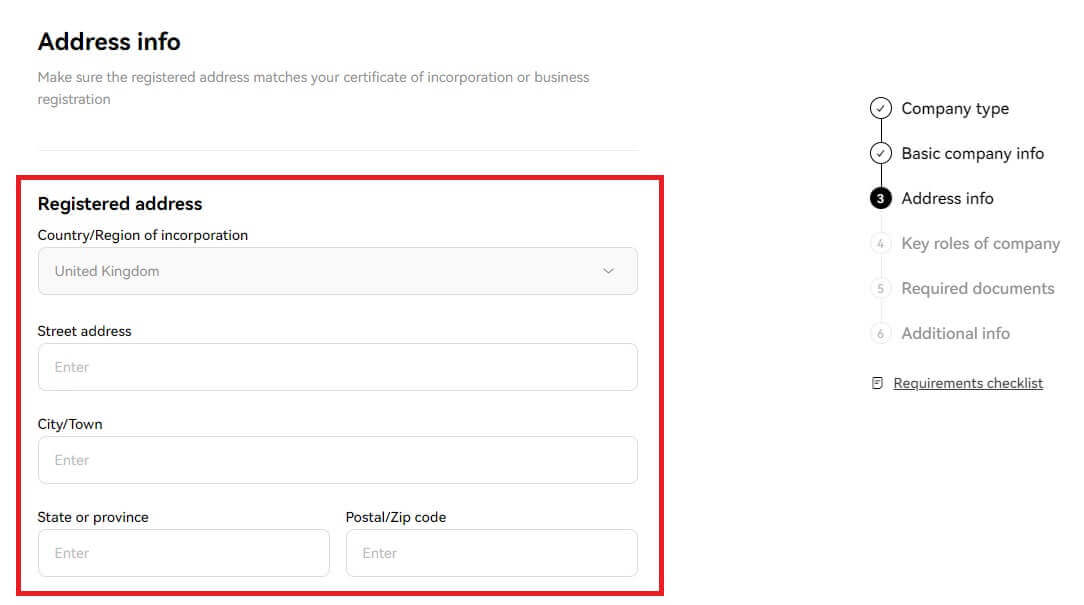
3. Fill in the rest of your company’s information following the list on the right. Click [Next] - [Submit].
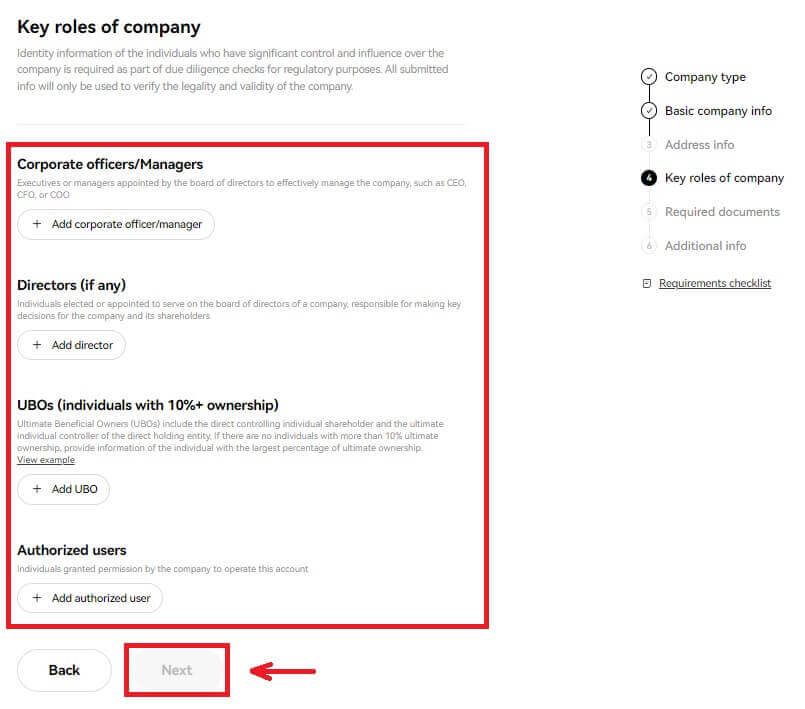
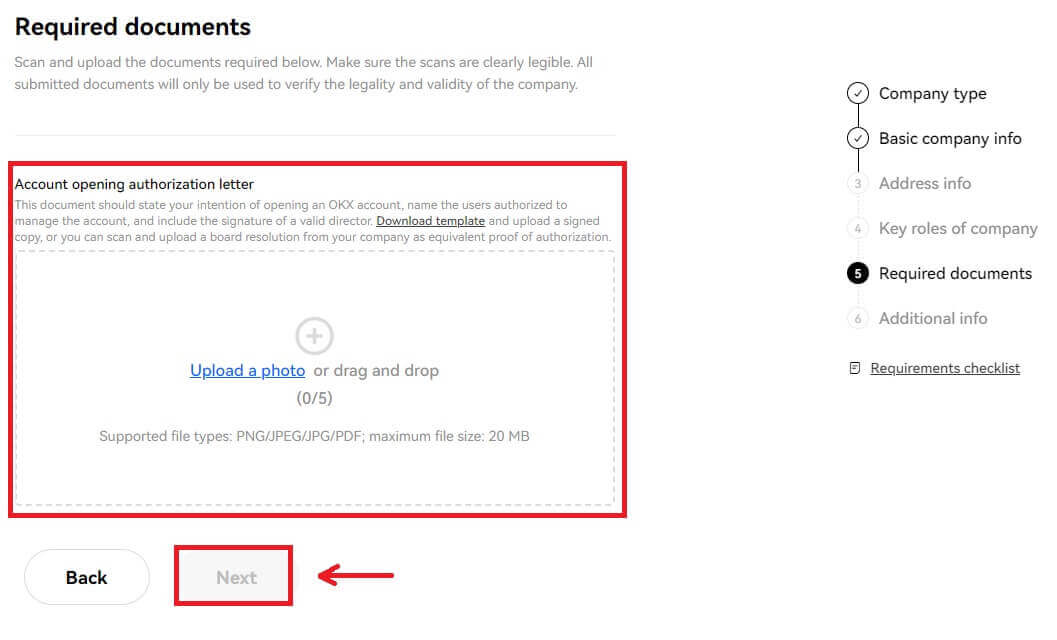
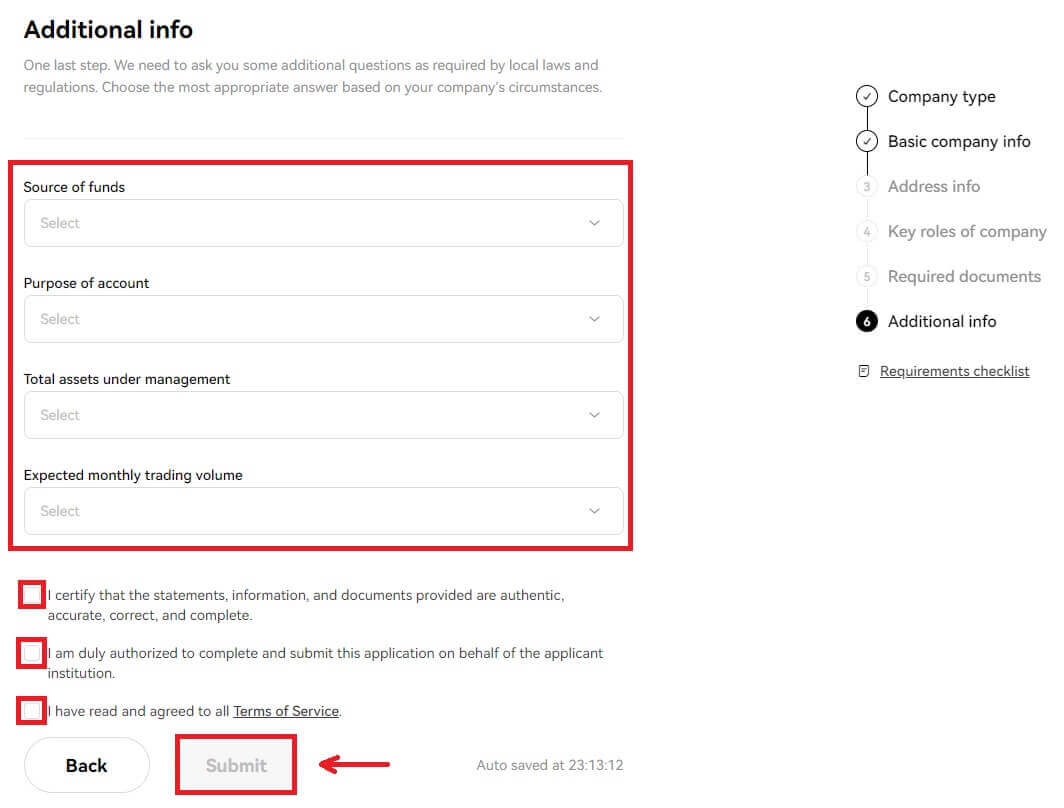
Note: You need to scan and upload the following documents
- Certificate of incorporation or business registration (or an equivalent official document, e.g. business license)
- Memorandum and articles of association
- Directors register
- Shareholders register or Beneficial Ownership structure chart (signed and dated within the last 12 months)
- Proof of business address (if different from registered address)
4. Sign, scan, and upload the below templates to complete the verification
- Account opening authorization letter (a board resolution that includes such an authorization is also acceptable)
- FCCQ Wolfsberg Questionnaire or equivalent AML policy document (signed and dated by a senior compliance officer)
Frequently Asked Questions (FAQ)
What information is needed for the verification process
Basic info
Provide basic information about yourself, such as full legal name, date of birth, country of residency, etc.. Please make sure that it’s correct and up to date.
ID documents
We accept valid government-issued IDs, passports, driving licenses, etc. They must meet the following requirements:
- Include your name, date of birth, issue and expiration date
- No screenshots of any kind are accepted
- Legible and with a clearly visible photo
- Include all corners of the document
- Not expired
Selfies
They must meet the following requirements:
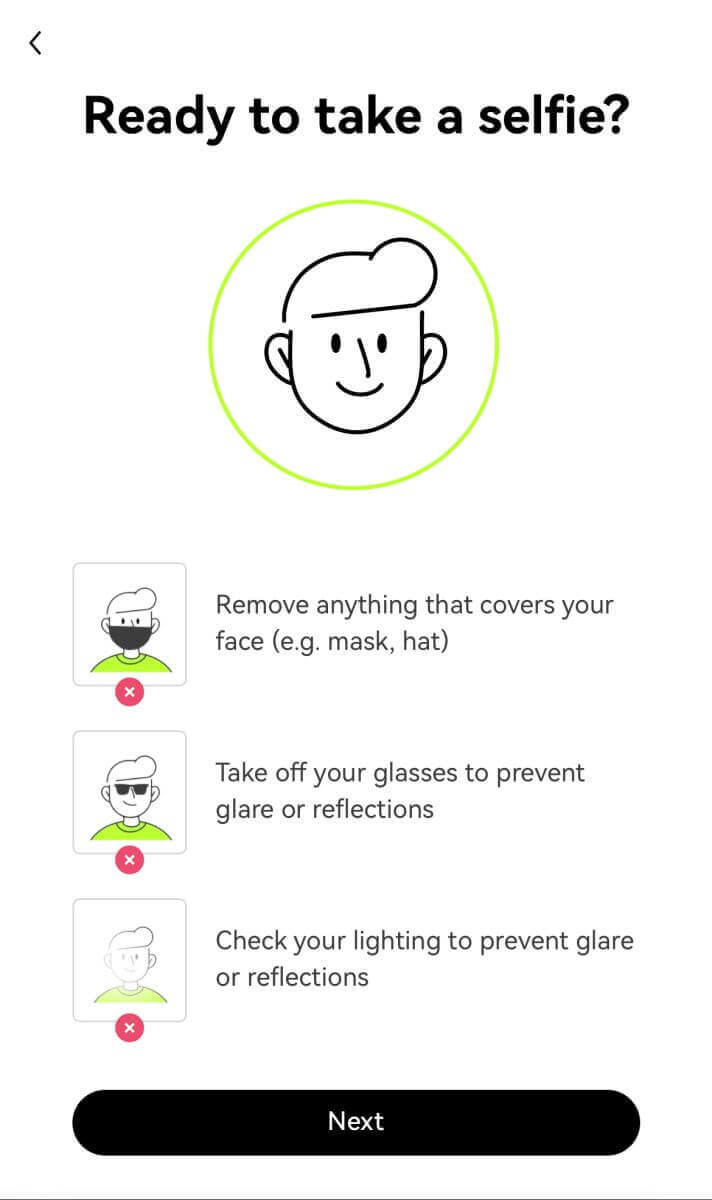
- Your entire face has to be placed within the oval frame
- No mask, glasses and hats
Proof of Address (if applicable)
They must meet the following requirements:
- Upload a document with your current residential address and legal name
- Make sure that the entire document is visible and issued within the last 3 months.
What’s the difference between individual verification and institutional verification?
As an individual, you need to provide your personal identity information (including but not limited to valid identity documents, facial recognition data, etc.) to unlock more features and increase your deposit/withdrawal limit.
As an institution, you need to provide valid legal documents of your institution’s incorporation and operations, along with the key roles’ identity information. After verification, you may enjoy higher benefits and better rates.
You can only verify one type of account. Choose the option that best suits your needs.
Which types of documents can I use to verify my residential address for account identity verification?
The following types of documents can be used to verify your address for identity verification:
- Driver’s license (if the address is visible and matches the address provided)
- Government-issued IDs with your current address
- Utility bills (water, electricity, and gas), bank statements, and property management invoices that were issued within the last 3 months and clearly show your current address and legal name
- Documentation or voter identification listing your full address and legal name issued within the last 3 months by your state or local government, your employer’s Human Resources or finance department, and university or college
